"8cf381d830761a9b"{"id":"24487","slug":"procedural-terrain-generation-with-unity","title":"Procedural Terrain Generation with Unity","category":"Unity","engine":"Video language: English","assetVersion":"Video language: English","engineVersion":"File content: video + supporting files + English subtitles","tag":"Unity","accent":"teal","visual":"luts","summary":"This Unity course follows the path from raw terrain shapes to more complete outdoor scenes, using C# to manipulate meshes, vegetation data, and rendering settings in URP. It also includes custom editor windows, inspector editors, and procedural approaches s...","platform":"Unity","updatedAt":"2026-04-20","sourceNotes":[],"fileContents":[],"compatibility":["Unity","Video language: English","File content: video + supporting files + English subtitles"],"featuredImage":{"alt":"Procedural Terrain Generation with Unity","src":"https://3dcghub.com/wp-content/uploads/2026/04/ead49845a0d3_1660066_829f_3.webp"},"hasDownloadLink":true,"galleryImages":[],"accessPanel":{"kind":"video-resource","title":"Access this video resource","eyebrow":"Free video resource","message":"Sign in or create an account to continue to the protected video package through the managed storage service.","fileName":"Procedural Terrain Generation with Unity.rar","safetyNote":"All resources are 100% manually reviewed to eliminate all risks.","actionLabel":"Download Free","resourceType":"Video package","sourceShortcode":"cryptomus_video"},"contentHtml":"\u003ch2\u003eOutdoor scenes shaped by code\u003c/h2\u003e\u003cp\u003eProcedural Terrain Generation with Unity focuses on the kind of scenes that need landscapes to carry the visual identity of the project: hills, surfaces, vegetation, water, and the final camera presentation that helps everything read clearly on screen. The material stays inside Unity and uses C# to work with mesh and vegetation data in URP, so the terrain process is tied to real scene-building work rather than isolated theory.\u003c/p\u003e\u003cp\u003eThe course approaches terrain as something that can be generated, adjusted, textured, and polished through code. That matters in a production workflow because the landscape is not treated as a static backdrop. It becomes a working part of the scene, with terrain shape, surface treatment, plant placement, and render settings all connected.\u003c/p\u003e\u003cp\u003eThe result is a course that fits projects where the environment needs to look natural and still be shaped through procedural methods. The emphasis is on realistic-looking landscapes and on the tools that support them inside the Unity Editor.\u003c/p\u003e\u003ch2\u003eFrom terrain object to procedural landform\u003c/h2\u003e\u003cp\u003eThe curriculum starts with the Unity terrain object and then moves into the procedural methods that drive the terrain work. Noise, Voronoi tessellation, and midpoint displacement each appear as distinct approaches, giving room to explore different ways of forming land surfaces. Those topics sit at the core of the course because they supply the structure that later terrain work depends on.\u003c/p\u003e\u003cp\u003eInstead of stopping at the idea of procedural generation, the material shows how terrain meshes can be manipulated with code to create realistic-looking landscapes. That means the emphasis is not only on generating shapes, but on producing terrain that can survive closer inspection in a scene. The course also covers texturing terrain meshes procedurally, so the surface treatment is part of the same workflow as the landform itself.\u003c/p\u003e\u003cp\u003eThis progression is important in practical use. A terrain system that begins with the Unity terrain object, then adds noise-based variation, tessellation, midpoint displacement, and procedural texturing, gives a more complete path from raw geometry to an environment that can actually be used in a project.\u003c/p\u003e\u003ch2\u003eVegetation, detail, and the parts that finish a landscape\u003c/h2\u003e\u003cp\u003eOnce the terrain shape is in place, the course moves into vegetation and detail. Those are the elements that help a landscape shift from a generated surface to a readable outdoor scene. Vegetation data is part of the courseâs focus, which keeps the workflow tied to the practical question of how a generated terrain gets filled out after the main forms are established.\u003c/p\u003e\u003cp\u003eThe curriculum also includes water, natural exposure, the Great Outdoors, and final touches. Taken together, those topics show a route from broad terrain construction into the smaller adjustments that affect how the scene feels. Natural exposure sits alongside the more visible finishing steps, while the final touches and postproduction hacks point to a last stage of presentation work rather than a stop at raw terrain generation.\u003c/p\u003e\u003cp\u003eThat sequence gives the course a clear production rhythm: first build the terrain, then layer in vegetation and detail, then refine the look of the scene. It is a practical order for environment work, especially when the goal is a believable outdoor area rather than a simple test map.\u003c/p\u003e\u003ch2\u003eURP, render settings, and camera-facing polish\u003c/h2\u003e\u003cp\u003eThe course is set in URP, and it includes manipulating render settings in Unity to produce better-looking camera results. That keeps the material close to the visual side of production, where terrain generation alone is rarely enough. How the scene renders, how exposure is handled, and how the final image reads through the camera all become part of the workflow.\u003c/p\u003e\u003cp\u003eThe inclusion of natural exposure and postproduction hacks reinforces that direction. The terrain is not only generated; it is also prepared for view. In a production setting, that can make the difference between a technically complete landscape and one that feels finished when seen in motion or through a framed shot.\u003c/p\u003e\u003cp\u003eThis section of the course connects the algorithmic side of terrain work with the presentation side. The mesh and vegetation data are manipulated through C#, while render settings and camera results are adjusted to support the final look.\u003c/p\u003e\u003ch2\u003eCustom editor windows and inspector work\u003c/h2\u003e\u003cp\u003eBeyond terrain generation itself, the course covers creating custom Unity windows and graphical user interface elements for use inside the Editor. It also includes writing custom Unity inspector editors. Those topics point to a workflow where the terrain tools are not hidden away, but brought into the editor in a form that can be used while developing the scene.\u003c/p\u003e\u003cp\u003eThat matters in procedural work because terrain generation often needs repeated testing and refinement. Custom editor windows and inspector tools give structure to that process. Instead of handling everything in a loose or manual way, the course includes the kind of editor-side work that supports ongoing adjustment of terrain, texturing, vegetation, and other scene elements.\u003c/p\u003e\u003cp\u003eThe target audience reflects that balance. It includes people interested in the algorithms used in procedural generation, people who want to develop code for realistic landscapes, and anyone who wants to learn how to write custom Unity inspector editors. The course workload is 29h 38m, and the material is set at an intermediate level, so it has enough depth for learners who want a substantial procedural workflow rather than a short overview.\u003c/p\u003e\u003cp\u003eFor projects that need outdoor environments shaped through code, this course fits as a terrain-focused Unity workflow with procedural methods, editor tools, vegetation work, and render polish all in one path.\u003c/p\u003e\n\n\u003ch2\u003eContinue Browsing Similar Packs\u003c/h2\u003e\n\u003cul\u003e\n\u003cli\u003e\u003ca href=\"https://3dcghub.com/learn-to-create-a-2d-action-zombie-game-in-unity/\" title=\"Learn to create a 2D Action Zombie Game in Unity\"\u003eLearn to create a 2D Action Zombie Game in Unity\u003c/a\u003e\u003c/li\u003e\n\u003cli\u003e\u003ca href=\"https://3dcghub.com/learn-to-create-advance-metroidvania-game-with-unity-c/\" title=\"Learn to create advance Metroidvania game with Unity \u0026amp;amp; C#\"\u003eLearn to create advance Metroidvania game with Unity \u0026amp; C#\u003c/a\u003e\u003c/li\u003e\n\u003cli\u003e\u003ca href=\"https://3dcghub.com/make-a-multiplayer-game-in-unity/\" title=\"Make a Multiplayer Game in Unity\"\u003eMake a Multiplayer Game in Unity\u003c/a\u003e\u003c/li\u003e\n\u003cli\u003e\u003ca href=\"https://3dcghub.com/stylized-grass-shader-for-unity-2021-2023/\" title=\"Stylized Grass Shader (for Unity 2021-2023)\"\u003eStylized Grass Shader (for Unity 2021-2023)\u003c/a\u003e\u003c/li\u003e\n\u003cli\u003e\u003ca href=\"https://3dcghub.com/make-a-horror-survival-game-in-unity/\" title=\"Make a horror survival game in Unity\"\u003eMake a horror survival game in Unity\u003c/a\u003e\u003c/li\u003e\n\u003c/ul\u003e","contentTextLength":6054,"navigation":{"current":1750,"total":2470,"previous":{"id":"24484","slug":"make-a-2d-platformer-in-unreal-engine-5-c","title":"Make a 2D platformer in Unreal engine 5 C++","category":"Unreal Engine","platform":"Unreal Engine","updatedAt":"2026-04-20"},"next":{"id":"24500","slug":"c-fundamentals-game-programming-for-beginners","title":"C++ Fundamentals: Game Programming For Beginners","category":"Unreal Engine","platform":"Unity","updatedAt":"2026-04-20"}},"relatedResources":[{"id":"24548","slug":"coding-in-unity-mastering-procedural-mesh-generation","title":"Coding in Unity: Mastering Procedural Mesh Generation","category":"Unity","engine":"Video language: English","assetVersion":"Video language: English","engineVersion":"File content: video + supporting files + English subtitles","tag":"Unity","accent":"blue","visual":"animation","summary":"This Unity course focuses on building meshes through code, starting with simple geometry and moving into terrain and landscape generation. It follows a clear path through shapes, mesh data, noise, and infinite landscapes, with a level aimed at intermediate...","platform":"Unity","updatedAt":"2026-04-20","sourceNotes":[],"fileContents":[],"compatibility":["Unity","Video language: English","File content: video + supporting files + English subtitles"],"featuredImage":{"alt":"Coding in Unity: Mastering Procedural Mesh Generation","src":"https://3dcghub.com/wp-content/uploads/2026/04/4d64af57e641_870650_188c.webp"},"hasDownloadLink":true},{"id":"24554","slug":"learn-how-to-create-a-2d-action-game-with-unity","title":"Learn how to create a 2D Action game with Unity","category":"Unity","engine":"Video language: English","assetVersion":"Video language: English","engineVersion":"File content: video + supporting files + English subtitles","tag":"Unity","accent":"cyan","visual":"city","summary":"A structured Unity course for making a Soul Knight-style 2D action game, from player setup and dungeon generation to weapons, enemies, and boss encounters. It also covers C#, clean code, and object-oriented programming in practice.","platform":"Unity","updatedAt":"2026-04-20","sourceNotes":[],"fileContents":[],"compatibility":["Unity","Video language: English","File content: video + supporting files + English subtitles"],"featuredImage":{"alt":"Learn how to create a 2D Action game with Unity","src":"https://3dcghub.com/wp-content/uploads/2026/04/7dc5c1d14c37_5572298_b8ce.webp"},"hasDownloadLink":true},{"id":"24276","slug":"mastering-editor-scripting-in-unity","title":"Mastering Editor Scripting in Unity","category":"Unity","engine":"Video language: English","assetVersion":"Video language: English","engineVersion":"File content: video + supporting files + English subtitles","tag":"Unity","accent":"violet","visual":"mech","summary":"Mastering Editor Scripting in Unity focuses on the parts of the editor that shape day-to-day production work: custom inspectors, GUI tools, editor modes, and asset automation. It moves from fundamentals into more specialized editor workflows that help organ...","platform":"Unity","updatedAt":"2026-04-19","sourceNotes":[],"fileContents":[],"compatibility":["Unity","Video language: English","File content: video + supporting files + English subtitles"],"featuredImage":{"alt":"Mastering Editor Scripting in Unity","src":"https://3dcghub.com/wp-content/uploads/2026/04/865616ddefa2_6047523_431f_2.webp"},"hasDownloadLink":true}]}
Unity
Procedural Terrain Generation with Unity
This Unity course follows the path from raw terrain shapes to more complete outdoor scenes, using C# to manipulate meshes, vegetation data, and rendering settings in URP. It also includes custom editor windows, inspector editors, and procedural approaches s...
Platform: UnityVideo language: EnglishFile content: video + supporting files + English subtitlesUpdated 2026-04-20
Unity
Resource overview
Outdoor scenes shaped by code
Procedural Terrain Generation with Unity focuses on the kind of scenes that need landscapes to carry the visual identity of the project: hills, surfaces, vegetation, water, and the final camera presentation that helps everything read clearly on screen. The material stays inside Unity and uses C# to work with mesh and vegetation data in URP, so the terrain process is tied to real scene-building work rather than isolated theory.
The course approaches terrain as something that can be generated, adjusted, textured, and polished through code. That matters in a production workflow because the landscape is not treated as a static backdrop. It becomes a working part of the scene, with terrain shape, surface treatment, plant placement, and render settings all connected.
The result is a course that fits projects where the environment needs to look natural and still be shaped through procedural methods. The emphasis is on realistic-looking landscapes and on the tools that support them inside the Unity Editor.
From terrain object to procedural landform
The curriculum starts with the Unity terrain object and then moves into the procedural methods that drive the terrain work. Noise, Voronoi tessellation, and midpoint displacement each appear as distinct approaches, giving room to explore different ways of forming land surfaces. Those topics sit at the core of the course because they supply the structure that later terrain work depends on.
Instead of stopping at the idea of procedural generation, the material shows how terrain meshes can be manipulated with code to create realistic-looking landscapes. That means the emphasis is not only on generating shapes, but on producing terrain that can survive closer inspection in a scene. The course also covers texturing terrain meshes procedurally, so the surface treatment is part of the same workflow as the landform itself.
This progression is important in practical use. A terrain system that begins with the Unity terrain object, then adds noise-based variation, tessellation, midpoint displacement, and procedural texturing, gives a more complete path from raw geometry to an environment that can actually be used in a project.
Vegetation, detail, and the parts that finish a landscape
Once the terrain shape is in place, the course moves into vegetation and detail. Those are the elements that help a landscape shift from a generated surface to a readable outdoor scene. Vegetation data is part of the courseâs focus, which keeps the workflow tied to the practical question of how a generated terrain gets filled out after the main forms are established.
The curriculum also includes water, natural exposure, the Great Outdoors, and final touches. Taken together, those topics show a route from broad terrain construction into the smaller adjustments that affect how the scene feels. Natural exposure sits alongside the more visible finishing steps, while the final touches and postproduction hacks point to a last stage of presentation work rather than a stop at raw terrain generation.
That sequence gives the course a clear production rhythm: first build the terrain, then layer in vegetation and detail, then refine the look of the scene. It is a practical order for environment work, especially when the goal is a believable outdoor area rather than a simple test map.
URP, render settings, and camera-facing polish
The course is set in URP, and it includes manipulating render settings in Unity to produce better-looking camera results. That keeps the material close to the visual side of production, where terrain generation alone is rarely enough. How the scene renders, how exposure is handled, and how the final image reads through the camera all become part of the workflow.
The inclusion of natural exposure and postproduction hacks reinforces that direction. The terrain is not only generated; it is also prepared for view. In a production setting, that can make the difference between a technically complete landscape and one that feels finished when seen in motion or through a framed shot.
This section of the course connects the algorithmic side of terrain work with the presentation side. The mesh and vegetation data are manipulated through C#, while render settings and camera results are adjusted to support the final look.
Custom editor windows and inspector work
Beyond terrain generation itself, the course covers creating custom Unity windows and graphical user interface elements for use inside the Editor. It also includes writing custom Unity inspector editors. Those topics point to a workflow where the terrain tools are not hidden away, but brought into the editor in a form that can be used while developing the scene.
That matters in procedural work because terrain generation often needs repeated testing and refinement. Custom editor windows and inspector tools give structure to that process. Instead of handling everything in a loose or manual way, the course includes the kind of editor-side work that supports ongoing adjustment of terrain, texturing, vegetation, and other scene elements.
The target audience reflects that balance. It includes people interested in the algorithms used in procedural generation, people who want to develop code for realistic landscapes, and anyone who wants to learn how to write custom Unity inspector editors. The course workload is 29h 38m, and the material is set at an intermediate level, so it has enough depth for learners who want a substantial procedural workflow rather than a short overview.
For projects that need outdoor environments shaped through code, this course fits as a terrain-focused Unity workflow with procedural methods, editor tools, vegetation work, and render polish all in one path.
 Unity
Unity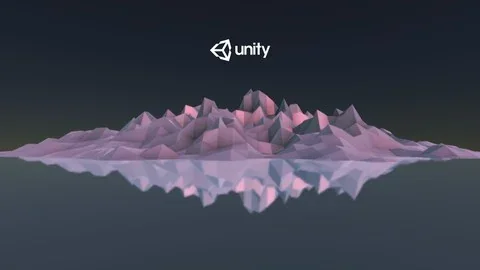 Unity
Unity Unity
Unity Unity
Unity