"8cf381d830761a9b"{"id":"24514","slug":"create-2d-multiplayer-game-with-photon-in-unity","title":"Create 2D Multiplayer Game with photon in unity","category":"Unity","engine":"Video language: English","assetVersion":"Video language: English","engineVersion":"File content: video + supporting files + English subtitles","tag":"Unity","accent":"violet","visual":"mech","summary":"This Unity workflow follows the build of a 2D multiplayer game with Photon from the first menu screens through player setup, UI, enemies, and progression systems. It also includes mobile joystick support, game sound, and a range character type.","platform":"Unity","updatedAt":"2026-04-20","sourceNotes":[],"fileContents":[],"compatibility":["Unity","Video language: English","File content: video + supporting files + English subtitles"],"featuredImage":{"alt":"Create 2D Multiplayer Game with photon in unity","src":"https://3dcghub.com/wp-content/uploads/2026/04/d0bd75435e19_4751476_9c73.webp"},"hasDownloadLink":true,"galleryImages":[],"accessPanel":{"kind":"video-resource","title":"Access this video resource","eyebrow":"Free video resource","message":"Sign in or create an account to continue to the protected video package through the managed storage service.","fileName":"Create 2D Multiplayer Game with photon in unity.rar","safetyNote":"All resources are 100% manually reviewed to eliminate all risks.","actionLabel":"Download Free","resourceType":"Video package","sourceShortcode":"cryptomus_video"},"contentHtml":"\u003ch2\u003eScenes that move from menu screens into multiplayer play\u003c/h2\u003e\nAt the center of this Unity workflow is the kind of 2D game scene that starts with a main menu and then moves into active multiplayer play. The structure is practical rather than abstract: it begins with the setup needed to get the game running, then carries that foundation through the player, camera, user interface, enemy, and environment layers that make a 2D game feel complete.\n\nPhoton is part of the multiplayer function, so the build is not just about placing sprites on a screen. It is about understanding how multiplayer game behavior fits into a Unity project and how those systems connect to the rest of the game. C# is included as part of the learning path, which keeps the workflow tied to the logic behind the scenes as well as the visible result on screen.\n\u003ch2\u003eWhat gets built across the workflow\u003c/h2\u003e\nThe instruction runs for 12h 25m and is listed at an all-levels difficulty, with the intended audience ranging from beginner to advanced. That combination makes the structure straightforward enough to follow from the ground up while still covering enough pieces to form a full 2D multiplayer game setup.\n\nThe curriculum moves through a clear sequence of systems and scenes:\n\u003cul\u003e\n \t\u003cli\u003eIntroduction\u003c/li\u003e\n \t\u003cli\u003eMain Menu\u003c/li\u003e\n \t\u003cli\u003eGame Setup\u003c/li\u003e\n \t\u003cli\u003ePlayer\u003c/li\u003e\n \t\u003cli\u003eCamera\u003c/li\u003e\n \t\u003cli\u003eGame UI\u003c/li\u003e\n \t\u003cli\u003eEnemy\u003c/li\u003e\n \t\u003cli\u003eEnvironment\u003c/li\u003e\n \t\u003cli\u003ePlayer Selection\u003c/li\u003e\n \t\u003cli\u003eShop System\u003c/li\u003e\n \t\u003cli\u003eNew Character Type (Range Charachter)\u003c/li\u003e\n \t\u003cli\u003eMobile Joystick\u003c/li\u003e\n \t\u003cli\u003eGame sound\u003c/li\u003e\n \t\u003cli\u003eLevel up System\u003c/li\u003e\n\u003c/ul\u003e\nThat sequence matters because it shows the workflow as a connected build instead of isolated lessons. The menu leads into setup. Setup leads into the player and camera. Those then connect to UI, enemies, and the surrounding environment. Later sections expand the game with selection, shop logic, a new character type, mobile control, sound, and leveling.\n\u003ch2\u003ePlayer control, camera behavior, and on-screen information\u003c/h2\u003e\nThe player, camera, and game UI sit near the center of the build because they define how the game is actually played and read. A 2D multiplayer game needs more than movement; it needs a way for the player to understand what is happening, where they are, and how the game responds to input. Those systems form the practical backbone of the experience.\n\nThe camera section suggests attention to how the game view follows or frames the action in a 2D space. The UI section adds the interface layer that supports that action. Together, they help shape the feel of the game without moving away from the core 2D structure. When paired with the player setup, they give the project the basic play loop needed before any expansion systems are added.\n\nThe inclusion of game sound also fits naturally here. Sound is part of how a 2D game communicates motion, feedback, and state changes, and placing it in the workflow alongside the player-facing systems keeps the project grounded in the overall play experience rather than in visual setup alone.\n\u003ch2\u003eEnemies, environment, and the added systems around progression\u003c/h2\u003e\nOnce the basic play layer is in place, the workflow moves into enemy and environment sections. That shift changes the project from a simple controlled scene into something that feels more like a game world. Enemies introduce interaction beyond movement, while the environment gives the 2D space a setting to support that interaction.\n\nThe later part of the curriculum adds more structure through player selection, a shop system, and a level up system. These are the kinds of systems that extend a game beyond a single action loop. Player selection gives the project another choice point before play begins. The shop system adds a separate layer of in-game management. Leveling gives the game a sense of ongoing progression.\n\nA new character type is also included, identified as a range character. That detail points to variation in how the game can be approached, since the build is not limited to one player style. The mobile joystick section extends the workflow further by covering touch-style input, which makes the project relevant to mobile play as well as other control setups.\n\u003ch2\u003eA fit for learning the full path from setup to playable structure\u003c/h2\u003e\nThis workflow is strongest when the goal is to follow the process of making a 2D multiplayer game in Unity from the beginning stages through the extra systems that shape replay and control. It keeps the attention on setup, implementation, and creative usage without drifting away from the parts named in the curriculum.\n\nBecause it covers C#, Unity 2D development, Photon multiplayer behavior, and a broad run of in-game systems, it fits projects that need a practical walkthrough rather than a narrow feature demo. The final shape is a game build that includes menus, play control, UI, enemies, environment, player selection, shop logic, mobile joystick input, sound, and leveling in one connected workflow.\n\nFor a 2D multiplayer project that needs a structured path from the first screen to the playable systems around it, this is a direct match.\n\n\u003ch2\u003eExplore Similar Assets\u003c/h2\u003e\n\u003cul\u003e\n \t\u003cli\u003e\u003ca title=\"Procedural Terrain Generation with Unity\" href=\"https://3dcghub.com/procedural-terrain-generation-with-unity/\"\u003eProcedural Terrain Generation with Unity\u003c/a\u003e\u003c/li\u003e\n \t\u003cli\u003e\u003ca title=\"Learn to create a 2D Action Zombie Game in Unity\" href=\"https://3dcghub.com/learn-to-create-a-2d-action-zombie-game-in-unity/\"\u003eLearn to create a 2D Action Zombie Game in Unity\u003c/a\u003e\u003c/li\u003e\n \t\u003cli\u003e\u003ca title=\"Learn to create advance Metroidvania game with Unity \u0026amp;amp; C#\" href=\"https://3dcghub.com/learn-to-create-advance-metroidvania-game-with-unity-c/\"\u003eLearn to create advance Metroidvania game with Unity \u0026amp; C#\u003c/a\u003e\u003c/li\u003e\n \t\u003cli\u003e\u003ca title=\"Make a Multiplayer Game in Unity\" href=\"https://3dcghub.com/make-a-multiplayer-game-in-unity/\"\u003eMake a Multiplayer Game in Unity\u003c/a\u003e\u003c/li\u003e\n \t\u003cli\u003e\u003ca title=\"Stylized Grass Shader (for Unity 2021-2023)\" href=\"https://3dcghub.com/stylized-grass-shader-for-unity-2021-2023/\"\u003eStylized Grass Shader (for Unity 2021-2023)\u003c/a\u003e\u003c/li\u003e\n\u003c/ul\u003e","contentTextLength":5199,"navigation":{"current":1752,"total":2470,"previous":{"id":"24500","slug":"c-fundamentals-game-programming-for-beginners","title":"C++ Fundamentals: Game Programming For Beginners","category":"Unreal Engine","platform":"Unity","updatedAt":"2026-04-20"},"next":{"id":"24518","slug":"mastering-unity-muse","title":"Mastering Unity Muse","category":"Unity","platform":"Unity","updatedAt":"2026-04-20"}},"relatedResources":[{"id":"24474","slug":"make-a-multiplayer-game-in-unity","title":"Make a Multiplayer Game in Unity","category":"Unity","engine":"Video language: English","assetVersion":"Video language: English","engineVersion":"File content: video + supporting files + English subtitles","tag":"Unity","accent":"violet","visual":"mech","summary":"This Unity course walks through building a multiplayer game that connects to Photon Unity Network, spawns players over a network, and keeps key stats synchronized. It also covers menus, game modes, multiple levels, and room handling in a single project flow.","platform":"Unity","updatedAt":"2026-04-20","sourceNotes":[],"fileContents":[],"compatibility":["Unity","Video language: English","File content: video + supporting files + English subtitles"],"featuredImage":{"alt":"Make a Multiplayer Game in Unity","src":"https://3dcghub.com/wp-content/uploads/2026/04/7d16db9eaddb_5539734_b95e.webp"},"hasDownloadLink":true},{"id":"24480","slug":"learn-to-create-a-2d-action-zombie-game-in-unity","title":"Learn to create a 2D Action Zombie Game in Unity","category":"Unity","engine":"Video language: English","assetVersion":"Video language: English","engineVersion":"File content: video + supporting files + English subtitles","tag":"Unity","accent":"amber","visual":"character","summary":"This beginner Unity course walks through the main parts of a 2D action zombie game: player setup, enemies, health, portals between levels, and level design. It is built for learners who want a guided path through a playable game project rather than disconne...","platform":"Unity","updatedAt":"2026-04-20","sourceNotes":[],"fileContents":[],"compatibility":["Unity","Video language: English","File content: video + supporting files + English subtitles"],"featuredImage":{"alt":"Learn to create a 2D Action Zombie Game in Unity","src":"https://3dcghub.com/wp-content/uploads/2026/04/4aae367ee741_5884848_cdbb_2.webp"},"hasDownloadLink":true},{"id":"22374","slug":"tanks-multiplayer-netcode-photon","title":"Tanks Multiplayer (Netcode, Photon)","category":"Tutorials","engine":"Original Unity version: 6000.0.23","assetVersion":"Original Unity version: 6000.0.23","engineVersion":"Asset Version:1.7.1","tag":"Tutorials","accent":"cyan","visual":"city","summary":"This template provides a robust framework for fast-paced arena battles, offering developers a choice between multiple networking backends and offline AI functionality.","platform":"Unity","updatedAt":"2026-04-19","sourceNotes":[],"fileContents":[],"compatibility":["Unity","Original Unity version: 6000.0.23","Asset Version: 1.7.1"],"featuredImage":{"alt":"Tanks Multiplayer (Netcode, Photon)","src":"https://3dcghub.com/wp-content/uploads/2026/04/087231f2be0a_59698eae-d631-4117-aae9-3e260bc4b5bb_1280x720_stretch.webp"},"hasDownloadLink":true}]}
Unity
Create 2D Multiplayer Game with photon in unity
This Unity workflow follows the build of a 2D multiplayer game with Photon from the first menu screens through player setup, UI, enemies, and progression systems. It also includes mobile joystick support, game sound, and a range character type.
Platform: UnityVideo language: EnglishFile content: video + supporting files + English subtitlesUpdated 2026-04-20
Unity
Resource overview
Scenes that move from menu screens into multiplayer play
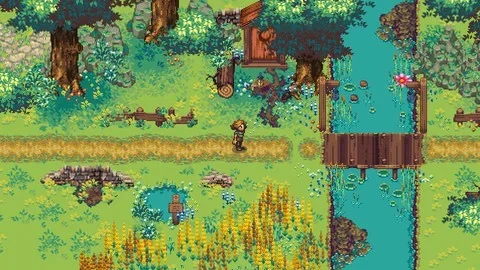
At the center of this Unity workflow is the kind of 2D game scene that starts with a main menu and then moves into active multiplayer play. The structure is practical rather than abstract: it begins with the setup needed to get the game running, then carries that foundation through the player, camera, user interface, enemy, and environment layers that make a 2D game feel complete.
Photon is part of the multiplayer function, so the build is not just about placing sprites on a screen. It is about understanding how multiplayer game behavior fits into a Unity project and how those systems connect to the rest of the game. C# is included as part of the learning path, which keeps the workflow tied to the logic behind the scenes as well as the visible result on screen.
What gets built across the workflow
The instruction runs for 12h 25m and is listed at an all-levels difficulty, with the intended audience ranging from beginner to advanced. That combination makes the structure straightforward enough to follow from the ground up while still covering enough pieces to form a full 2D multiplayer game setup.
The curriculum moves through a clear sequence of systems and scenes:
Introduction
Main Menu
Game Setup
Player
Camera
Game UI
Enemy
Environment
Player Selection
Shop System
New Character Type (Range Charachter)
Mobile Joystick
Game sound
Level up System
That sequence matters because it shows the workflow as a connected build instead of isolated lessons. The menu leads into setup. Setup leads into the player and camera. Those then connect to UI, enemies, and the surrounding environment. Later sections expand the game with selection, shop logic, a new character type, mobile control, sound, and leveling.
Player control, camera behavior, and on-screen information
The player, camera, and game UI sit near the center of the build because they define how the game is actually played and read. A 2D multiplayer game needs more than movement; it needs a way for the player to understand what is happening, where they are, and how the game responds to input. Those systems form the practical backbone of the experience.
The camera section suggests attention to how the game view follows or frames the action in a 2D space. The UI section adds the interface layer that supports that action. Together, they help shape the feel of the game without moving away from the core 2D structure. When paired with the player setup, they give the project the basic play loop needed before any expansion systems are added.
The inclusion of game sound also fits naturally here. Sound is part of how a 2D game communicates motion, feedback, and state changes, and placing it in the workflow alongside the player-facing systems keeps the project grounded in the overall play experience rather than in visual setup alone.
Enemies, environment, and the added systems around progression
Once the basic play layer is in place, the workflow moves into enemy and environment sections. That shift changes the project from a simple controlled scene into something that feels more like a game world. Enemies introduce interaction beyond movement, while the environment gives the 2D space a setting to support that interaction.
The later part of the curriculum adds more structure through player selection, a shop system, and a level up system. These are the kinds of systems that extend a game beyond a single action loop. Player selection gives the project another choice point before play begins. The shop system adds a separate layer of in-game management. Leveling gives the game a sense of ongoing progression.
A new character type is also included, identified as a range character. That detail points to variation in how the game can be approached, since the build is not limited to one player style. The mobile joystick section extends the workflow further by covering touch-style input, which makes the project relevant to mobile play as well as other control setups.
A fit for learning the full path from setup to playable structure
This workflow is strongest when the goal is to follow the process of making a 2D multiplayer game in Unity from the beginning stages through the extra systems that shape replay and control. It keeps the attention on setup, implementation, and creative usage without drifting away from the parts named in the curriculum.
Because it covers C#, Unity 2D development, Photon multiplayer behavior, and a broad run of in-game systems, it fits projects that need a practical walkthrough rather than a narrow feature demo. The final shape is a game build that includes menus, play control, UI, enemies, environment, player selection, shop logic, mobile joystick input, sound, and leveling in one connected workflow.
For a 2D multiplayer project that needs a structured path from the first screen to the playable systems around it, this is a direct match.
 Unity
Unity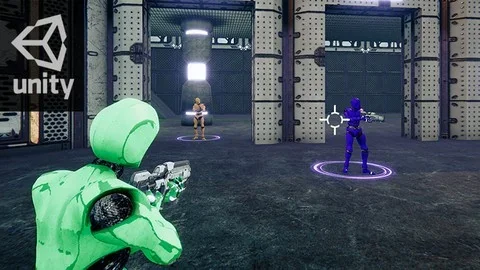 Unity
Unity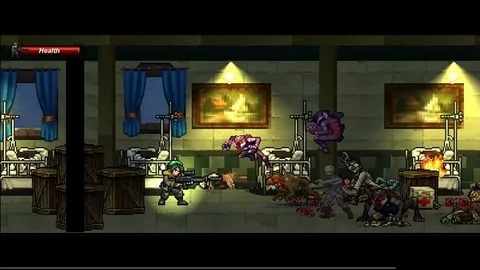 Unity
Unity Tutorials