"c68a05d5e51405b3"{"id":"1001118","slug":"pcg-geometry-decals","title":"PCG Geometry Decals","category":"Procedural Systems","engine":"5.5+","assetVersion":"","engineVersion":"Engine Version: 5.5+","tag":"Procedural Systems","accent":"blue","visual":"mech","summary":"Terrain-conforming PCG decals for Unreal landscapes with heightmap-driven displacement, full Details panel control, and a bake path to Nanite static meshes.","platform":"Unreal Engine","publishedAt":"2026-09-07T12:52:22.101Z","updatedAt":"2026-09-07T12:52:22.101Z","sourceNotes":[],"fileContents":[],"compatibility":["Unreal Engine","Engine Version: 5.5+"],"featuredImage":{"alt":"PCG Geometry Decals","src":"/wp-content/uploads/published/2026/09/eb259e96f79a-fa2bb67a-495b-4190-89b7-3a6b6c873518-808b1ade5a.webp"},"hasDownloadLink":true,"downloads":0,"terms":[{"taxonomy":"category","slug":"procedural-systems","name":"Procedural Systems"}],"galleryImages":[{"src":"/wp-content/uploads/published/2026/09/aa0bb49b2cd0-257e09b5-c12f-47af-b044-650117ee0d40-298ea6f31b.webp","alt":"PCG Geometry Decals"},{"src":"/wp-content/uploads/published/2026/09/6ba1737a3646-984fada5-ac5f-4386-8ae7-98726fb206dd-ae260e4b00.webp","alt":"PCG Geometry Decals"},{"src":"/wp-content/uploads/published/2026/09/bf2cd9b95273-fdcdf6d0-f8e0-4d44-8218-cf0f205b263c-5ccbfede31.webp","alt":"PCG Geometry Decals"},{"src":"/wp-content/uploads/published/2026/09/8c76ec6c7439-b23a0cf5-b121-4b46-89fe-72ac152700ce-097530c8c6.webp","alt":"PCG Geometry Decals"},{"src":"/wp-content/uploads/published/2026/09/aca0a1d084fa-5e471ee5-cf26-41e0-a1d0-b403ec44bdd9-07248a6d2f.webp","alt":"PCG Geometry Decals"},{"src":"/wp-content/uploads/published/2026/09/3fd15e10c06b-3bb924c0-cc7d-4220-b379-980e0b91c6c3-162ed8d8ca.webp","alt":"PCG Geometry Decals"},{"src":"/wp-content/uploads/published/2026/09/20a8e566c9f9-5333a4f0-d870-442b-81e9-16ade23db3be-856de7c133.webp","alt":"PCG Geometry Decals"}],"accessPanel":{"kind":"resource","title":"Download this resource","eyebrow":"Free Download","message":"Log in or create a free account to start your download.","fileName":"Content.7z","safetyNote":"Resources are manually reviewed before listing to improve quality and reduce obvious risks.","actionLabel":"Download Free","resourceType":"Resource archive"},"contentHtml":"\u003ch2\u003eEnable GeometryScripting, PCG, and Interop Plugins First\u003c/h2\u003e\u003cp\u003eTo bring geometry decals into an Unreal landscape project, the first step is to open the Plugins menu and enable four subsystems: GeometryScripting, PCG, PCGGeometryScriptInterop, and ModelingToolsEditorMode. The project then needs a restart. Once that happens, the PCG-driven decal workflow is available in the editor.\u003c/p\u003e\u003cp\u003ePCG Geometry Decals takes a different route from a conventional material decal. Instead of projecting a translucent texture onto a surface, each decal actor generates geometry that conforms to the landscape underneath. That geometry can be displaced, blended, and eventually baked to a Nanite-ready static mesh.\u003c/p\u003e\u003cp\u003eBecause the included blueprint is Editor-only, the generation stage is meant to happen during level creation. PCG runs asynchronously, so editing a decal does not stall the editor. Placing an actor and seeing its PCG-driven geometry appear in real time keeps the iteration loop tight when you are still shaping a composition. The trade-off surfaces at the end of the workflow: to move a decal into a shipped game, it must be baked.\u003c/p\u003e\u003ch2\u003eDrag a BP_GeometryDecal Into a Level or Subclass One\u003c/h2\u003e\u003cp\u003eThe examples folder at /Game/PCGGeometryDecals/Demo/Examples/ contains actors with the BP_GeometryDecal_ prefix. These are ready-made variants with materials and textures preassigned. Dragging one into a level auto-generates PCG-driven geometry on placement. The geometry snaps to the landscape shape and uses heightmap-driven data to displace the surface, building detail that is genuinely geometric rather than a normal-map illusion.\u003c/p\u003e\u003cp\u003eAnother route is to subclass the base BP_GeometryDecal. That lets you keep the same decal behavior while assigning your own material and height texture. Either path leads to a decal whose footprint, depth, and texture response can be tuned without needing a custom writer inside the landscape material graph.\u003c/p\u003e\u003ch2\u003eDisplacement, Falloff, Radius, and UVs From One Panel\u003c/h2\u003e\u003cp\u003eOnce a decal is in the scene, the Details panel is the main control surface. You can adjust radius, height intensity, falloff, UV tiling, and resolution without leaving the panel. Radius changes how wide the decal grows across the terrain. Height intensity scales how far the heightmap pushes geometry out of the surface. Falloff softens the edge transition, so the generated geometry merges into the landscape instead of ending at a hard border. UV tiling repositions the texture sample across the decal, and resolution controls how finely the geometry is meshed.\u003c/p\u003e\u003cp\u003eMaterial assignment, displacement, falloff, radius, UVs, and resolution are all editable from the same place. That keeps the decal in a single inspector-driven workflow instead of forcing you into blueprint editing or external tools for basic adjustments.\u003c/p\u003e\u003ch2\u003eBake Selected Decals to Nanite Static Meshes\u003c/h2\u003e\u003cp\u003eWhen a decal leaves the editor-only stage, it has to be converted. Select one or more decals in the level, right-click, and choose Scripted Actor Actions → Bake to Static Meshes. The action generates static meshes from the decal geometry. If the resulting mesh is meant to be used at runtime, enable Nanite on it in the popup window settings after the bake.\u003c/p\u003e\u003cp\u003eThe Editor-only blueprint never ships inside the game executable. For production, the final step is always to bake the decals into optimized static meshes. The bake path is what makes the process acceptable for cinematics, games, and other runtime contexts where PCG generation would be too heavy to run live.\u003c/p\u003e\u003ch2\u003eTerrain Stamping, Stylized Layers, Lookdev, and Cinematics\u003c/h2\u003e\u003cp\u003eThe workflow covers several environment-art needs. Photoreal terrain stamping can add cliffs, soil, or gravel with full geometric depth. Stylized environments benefit from layered terrain elements that keep clean artistic direction. Lookdev and kitbashing become faster because the async PCG behavior allows quick visual iteration without stepping into expensive manual geometry. Games and cinematics can gain micro-terrain variation without touching the landscape material.\u003c/p\u003e\u003cp\u003eThat separation matters in practice. The landscape material stays logically simple, while the geometry decal handles the local surface complexity. Whether you need a gravel patch, a rocky cliff edge, or a stylized raised path, the decal gives you a contained way to add that detail.\u003c/p\u003e\u003ch2\u003eMaster Material, Child Blueprints, and CC0 Demo Textures\u003c/h2\u003e\u003cp\u003eThe demo content is arranged around a master material and a set of preconfigured child blueprints. The child blueprints come with materials and textures already assigned, so you can place a fully working decal without wiring anything by hand. The BP_GeometryDecal_* actors inside Demo/Examples are examples of that faster iteration path.\u003c/p\u003e\u003cp\u003eDemo content includes textures from PolyHaven under the CC0 license, which gives you a legal and practical starting point for tests. For an environment artist or technical artist, PCG Geometry Decals offers a way to place high-resolution, terrain-conforming surface detail without hand-sculpting the whole landscape. Enable the plugins, drop in a decal, tune displacement and falloff, and bake once you are satisfied with the result.\u003c/p\u003e\n\n\u003ch2\u003eExplore Similar Assets\u003c/h2\u003e\n\u003cul\u003e\n\u003cli\u003e\u003ca href=\"https://3dcghub.com/natural-pcg-tools/\" title=\"Natural PCG Tools\"\u003eNatural PCG Tools\u003c/a\u003e\u003c/li\u003e\n\u003cli\u003e\u003ca href=\"https://3dcghub.com/easy-decal-roads-rvt/\" title=\"Easy Decal Roads RVT\"\u003eEasy Decal Roads RVT\u003c/a\u003e\u003c/li\u003e\n\u003cli\u003e\u003ca href=\"https://3dcghub.com/procedural-mesh-blueprint/\" title=\"Procedural Mesh Blueprint\"\u003eProcedural Mesh Blueprint\u003c/a\u003e\u003c/li\u003e\n\u003cli\u003e\u003ca href=\"https://3dcghub.com/calysto-village-procedural-villages-farms-with-pcg/\" title=\"Calysto Village Procedural villages, farms with PCG\"\u003eCalysto Village Procedural villages, farms with PCG\u003c/a\u003e\u003c/li\u003e\n\u003cli\u003e\u003ca href=\"https://3dcghub.com/autoenv-procedural-rock-cliffs/\" title=\"AutoEnv Procedural Rock Cliffs\"\u003eAutoEnv Procedural Rock Cliffs\u003c/a\u003e\u003c/li\u003e\n\u003c/ul\u003e","contentTextLength":5323,"navigation":{"current":857,"total":3860,"previous":{"id":"1001119","slug":"plant-fruits-and-vegetables","title":"plant Fruits and vegetables","category":"Nature \u0026 Plants","platform":"Unreal Engine","updatedAt":"2026-09-07T12:55:52.646Z"},"next":{"id":"1001117","slug":"open-world-locomotion-system","title":"Open World Locomotion System","category":"Gameplay Features","platform":"Unreal Engine","updatedAt":"2026-09-07T12:46:04.945Z"}},"relatedResources":[{"id":"1001793","slug":"biome-generator-pcg","title":"Biome Generator PCG","category":"Procedural Systems","engine":"5.4+","assetVersion":"","engineVersion":"Engine Version: 5.4+","tag":"Procedural Systems","accent":"blue","visual":"mech","summary":"Create procedurally populated landscapes with Biome Generator PCG. Includes Ver1.0, Ver2.0, HillGeneratorPCG, and template meshes.","platform":"Unreal Engine","publishedAt":"2026-10-21T07:45:47.706Z","updatedAt":"2026-10-21T07:45:47.706Z","sourceNotes":[],"fileContents":[],"compatibility":["Unreal Engine","Engine Version: 5.4+"],"featuredImage":{"alt":"Biome Generator PCG","src":"/wp-content/uploads/published/2026/10/6bba3e3f6d25-b9821c06-8ca1-437a-bfb4-4a77772dd22b-2e0fa07ab5.webp"},"hasDownloadLink":true,"downloads":0},{"id":"1000855","slug":"natural-pcg-tools","title":"Natural PCG Tools","category":"Procedural Systems","engine":"5.5+","assetVersion":"","engineVersion":"Engine Version: 5.5+","tag":"Procedural Systems","accent":"blue","visual":"mech","summary":"UE5.6+ procedural tool built on PCG and blueprints. Version 1.7 adds mesh and snow projection, spline scattering, exclusion, and scriptable tool modes.","platform":"Unreal Engine","publishedAt":"2026-08-04T17:03:37.725Z","updatedAt":"2026-08-04T17:03:37.725Z","sourceNotes":[],"fileContents":[],"compatibility":["Unreal Engine","Engine Version: 5.5+"],"featuredImage":{"alt":"Natural PCG Tools","src":"/wp-content/uploads/published/2026/08/319c7a1f5f63-bdb23e53-6e77-4e4d-82bf-ee5135349816-edc8098835.webp"},"hasDownloadLink":true,"downloads":1},{"id":"1000816","slug":"easy-decal-roads-rvt","title":"Easy Decal Roads RVT","category":"Procedural Systems","engine":"5.4+","assetVersion":"","engineVersion":"Engine Version: 5.4+","tag":"Procedural Systems","accent":"blue","visual":"mech","summary":"Easy Decal Roads RVT is a road creation tool for Unreal Engine using Runtime Virtual Texturing to build roads and intersections without mesh clipping or Z-fight","platform":"Unreal Engine","publishedAt":"2026-07-31T11:21:23.146Z","updatedAt":"2026-07-31T11:21:41.063Z","sourceNotes":[],"fileContents":[],"compatibility":["Unreal Engine","Engine Version: 5.4+"],"featuredImage":{"alt":"Easy Decal Roads RVT","src":"/wp-content/uploads/published/2026/07/e4482c7d4a89-d67b2e8a-2aff-490a-8ae1-253b1bf2996d-2896d9aeb8.webp"},"hasDownloadLink":true,"downloads":1}]}
Procedural Systems
PCG Geometry Decals
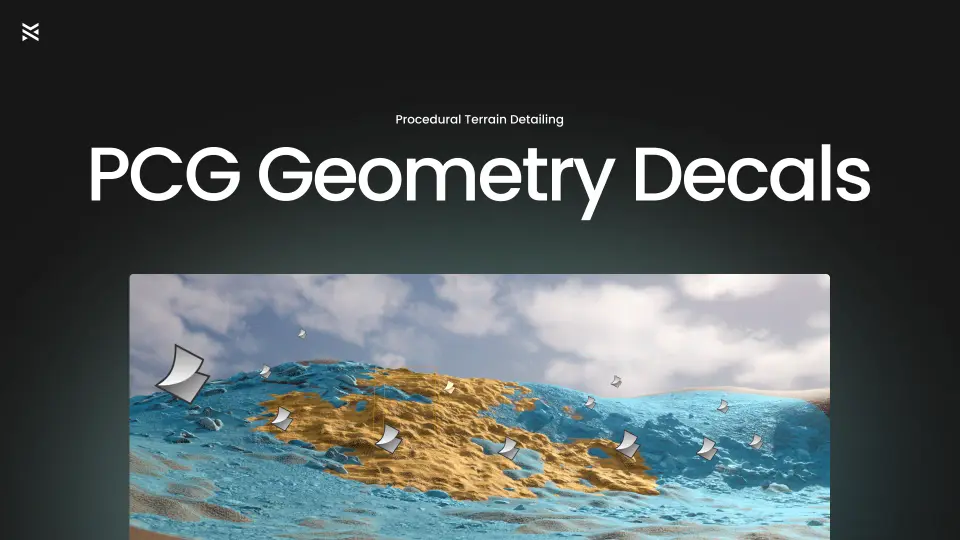
Terrain-conforming PCG decals for Unreal landscapes with heightmap-driven displacement, full Details panel control, and a bake path to Nanite static meshes.
Enable GeometryScripting, PCG, and Interop Plugins First
To bring geometry decals into an Unreal landscape project, the first step is to open the Plugins menu and enable four subsystems: GeometryScripting, PCG, PCGGeometryScriptInterop, and ModelingToolsEditorMode. The project then needs a restart. Once that happens, the PCG-driven decal workflow is available in the editor.
PCG Geometry Decals takes a different route from a conventional material decal. Instead of projecting a translucent texture onto a surface, each decal actor generates geometry that conforms to the landscape underneath. That geometry can be displaced, blended, and eventually baked to a Nanite-ready static mesh.
Because the included blueprint is Editor-only, the generation stage is meant to happen during level creation. PCG runs asynchronously, so editing a decal does not stall the editor. Placing an actor and seeing its PCG-driven geometry appear in real time keeps the iteration loop tight when you are still shaping a composition. The trade-off surfaces at the end of the workflow: to move a decal into a shipped game, it must be baked.
Drag a BP_GeometryDecal Into a Level or Subclass One
The examples folder at /Game/PCGGeometryDecals/Demo/Examples/ contains actors with the BP_GeometryDecal_ prefix. These are ready-made variants with materials and textures preassigned. Dragging one into a level auto-generates PCG-driven geometry on placement. The geometry snaps to the landscape shape and uses heightmap-driven data to displace the surface, building detail that is genuinely geometric rather than a normal-map illusion.
Another route is to subclass the base BP_GeometryDecal. That lets you keep the same decal behavior while assigning your own material and height texture. Either path leads to a decal whose footprint, depth, and texture response can be tuned without needing a custom writer inside the landscape material graph.
Displacement, Falloff, Radius, and UVs From One Panel
Once a decal is in the scene, the Details panel is the main control surface. You can adjust radius, height intensity, falloff, UV tiling, and resolution without leaving the panel. Radius changes how wide the decal grows across the terrain. Height intensity scales how far the heightmap pushes geometry out of the surface. Falloff softens the edge transition, so the generated geometry merges into the landscape instead of ending at a hard border. UV tiling repositions the texture sample across the decal, and resolution controls how finely the geometry is meshed.
Material assignment, displacement, falloff, radius, UVs, and resolution are all editable from the same place. That keeps the decal in a single inspector-driven workflow instead of forcing you into blueprint editing or external tools for basic adjustments.
Bake Selected Decals to Nanite Static Meshes
When a decal leaves the editor-only stage, it has to be converted. Select one or more decals in the level, right-click, and choose Scripted Actor Actions → Bake to Static Meshes. The action generates static meshes from the decal geometry. If the resulting mesh is meant to be used at runtime, enable Nanite on it in the popup window settings after the bake.
The Editor-only blueprint never ships inside the game executable. For production, the final step is always to bake the decals into optimized static meshes. The bake path is what makes the process acceptable for cinematics, games, and other runtime contexts where PCG generation would be too heavy to run live.
Terrain Stamping, Stylized Layers, Lookdev, and Cinematics
The workflow covers several environment-art needs. Photoreal terrain stamping can add cliffs, soil, or gravel with full geometric depth. Stylized environments benefit from layered terrain elements that keep clean artistic direction. Lookdev and kitbashing become faster because the async PCG behavior allows quick visual iteration without stepping into expensive manual geometry. Games and cinematics can gain micro-terrain variation without touching the landscape material.
That separation matters in practice. The landscape material stays logically simple, while the geometry decal handles the local surface complexity. Whether you need a gravel patch, a rocky cliff edge, or a stylized raised path, the decal gives you a contained way to add that detail.
Master Material, Child Blueprints, and CC0 Demo Textures
The demo content is arranged around a master material and a set of preconfigured child blueprints. The child blueprints come with materials and textures already assigned, so you can place a fully working decal without wiring anything by hand. The BP_GeometryDecal_* actors inside Demo/Examples are examples of that faster iteration path.
Demo content includes textures from PolyHaven under the CC0 license, which gives you a legal and practical starting point for tests. For an environment artist or technical artist, PCG Geometry Decals offers a way to place high-resolution, terrain-conforming surface detail without hand-sculpting the whole landscape. Enable the plugins, drop in a decal, tune displacement and falloff, and bake once you are satisfied with the result.
 Procedural Systems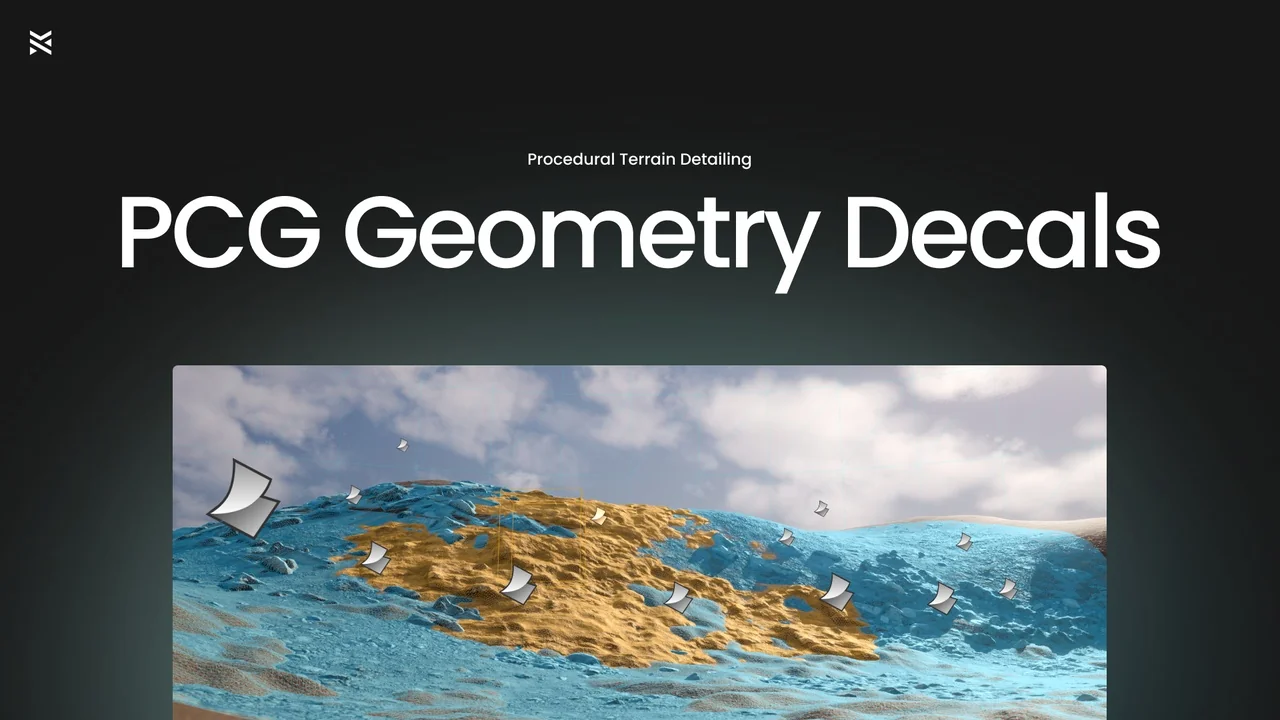
 Procedural Systems
 Procedural Systems
 Procedural Systems