"bb7a96bd710f8a97"{"id":"1000855","slug":"natural-pcg-tools","title":"Natural PCG Tools","category":"Procedural Systems","engine":"5.5+","assetVersion":"","engineVersion":"Engine Version: 5.5+","tag":"Procedural Systems","accent":"blue","visual":"mech","summary":"UE5.6+ procedural tool built on PCG and blueprints. Version 1.7 adds mesh and snow projection, spline scattering, exclusion, and scriptable tool modes.","platform":"Unreal Engine","publishedAt":"2026-08-04T17:03:37.725Z","updatedAt":"2026-08-04T17:03:37.725Z","sourceNotes":[],"fileContents":[],"compatibility":["Unreal Engine","Engine Version: 5.5+"],"featuredImage":{"alt":"Natural PCG Tools","src":"/wp-content/uploads/published/2026/08/319c7a1f5f63-bdb23e53-6e77-4e4d-82bf-ee5135349816-edc8098835.webp"},"hasDownloadLink":true,"downloads":1,"terms":[{"taxonomy":"category","slug":"procedural-systems","name":"Procedural Systems"}],"galleryImages":[{"src":"/wp-content/uploads/published/2026/08/1646efcc98c2-fcff3ff3-cd89-4d59-8ca4-8040a7e8ddce-41e62b2ee4.webp","alt":"Natural PCG Tools"},{"src":"/wp-content/uploads/published/2026/08/3d8e2d20ed07-063ea9e6-818d-4277-9992-3682bca2767f-786c4ad7a1.webp","alt":"Natural PCG Tools"},{"src":"/wp-content/uploads/published/2026/08/9d15309c4965-a0d7c1d5-e9e6-4295-8aee-1cdb7103bc80-be48dc0877.webp","alt":"Natural PCG Tools"},{"src":"/wp-content/uploads/published/2026/08/501a648a92e8-7b30a501-5754-47a3-86f7-68d81242f458-39149408cd.webp","alt":"Natural PCG Tools"},{"src":"/wp-content/uploads/published/2026/08/19e6197b442c-97ab32a4-06b1-40c3-be9d-e1dce6a8738c-ade390e557.webp","alt":"Natural PCG Tools"},{"src":"/wp-content/uploads/published/2026/08/3ebfb3bd9ef2-d8abaad6-242d-4efa-bd7a-94d9c29e79d4-d8b1632da2.webp","alt":"Natural PCG Tools"},{"src":"/wp-content/uploads/published/2026/08/36947a44b2c3-12dd0d18-e845-4209-bba5-c04bfb7450cf-344701df17.webp","alt":"Natural PCG Tools"},{"src":"/wp-content/uploads/published/2026/08/37401a8ed213-6b3867d4-d3a5-41c8-b495-1961508d2adc-8f5da3d38e.webp","alt":"Natural PCG Tools"},{"src":"/wp-content/uploads/published/2026/08/4b54075cf826-dff9fa71-ed05-4304-9046-5b58e6f72b47-edba41ed33.webp","alt":"Natural PCG Tools"},{"src":"/wp-content/uploads/published/2026/08/efcd9db0d916-2ac7eed0-d5fa-43ea-836d-abd1f5f199e3-b1200290bb.webp","alt":"Natural PCG Tools"}],"accessPanel":{"kind":"resource","title":"Download this resource","eyebrow":"Free Download","message":"Log in or create a free account to start your download.","fileName":"Content.7z","safetyNote":"Resources are manually reviewed before listing to improve quality and reduce obvious risks.","actionLabel":"Download Free","resourceType":"Resource archive"},"contentHtml":"\u003cp\u003e\u003cem\u003eNatural PCG Tools\u003c/em\u003e runs on the Procedural Content Generation (PCG) system and Blueprints built into Unreal Engine 5 (UE5), extending the engine's native procedural workflow instead of replacing it. The tool is aimed at environment construction: placing props across terrain, projecting geometry onto Meshes, adding snow coverage, and keeping scattered objects inside or outside user-defined areas. The current release is V1.7, and from V1.7 onwards, only Unreal Engine 5.6 (UE5.6) and newer is supported.\u003c/p\u003e\n\n\u003cp\u003eThe V1.7 Showcase video demonstrates only a portion of the feature set; the documentation supplied with the tool provides more comprehensive explanations and examples. More PCG Blueprints are planned for future updates, with additions or optimizations arriving over time. That makes the tool a moving target in a good sense—the function list in V1.7 is the starting point, not the ceiling.\u003c/p\u003e\n\n\u003cp\u003eBecause everything runs through UE5's PCG and Blueprints, the tool stays close to the engine's own logic. There is no separate runtime to learn, and the Blueprints can be opened, inspected, and adapted like any other procedural setup in the Editor.\u003c/p\u003e\n\n\u003ch2\u003eV1.7's Scattering and Projection Tools, Grouped by Job\u003c/h2\u003e\n\n\u003cp\u003eThe current function list splits into projection, scatter placement, exclusion, and scriptable editing tools.\u003c/p\u003e\n\n\u003cp\u003e\u003ccode\u003eMeshProjection\u003c/code\u003e and \u003ccode\u003eSnowProjection\u003c/code\u003e were both added in V2. The 1st projects objects onto Mesh surfaces, which suits placing geometry on uneven or complex surfaces. The 2nd applies the same idea to snow, generating snow coverage across a scene for winter or weather-driven environments. Projection aligns the generated objects with the surface they land on, which is what separates these 2 functions from the scatter group.\u003c/p\u003e\n\n\u003cp\u003eThe scatter functions cover a wider range of layout patterns. \u003ccode\u003eScatter Objects on a Mesh\u003c/code\u003e distributes objects across a Mesh surface. The spline-based options scatter objects along a Spline, scatter objects within a Spline, and scatter objects at any angle. A dedicated mode simulates scattering objects on vines or cables; that mode is only available in \u003ccode\u003eScriptable Tool\u003c/code\u003e mode. \u003ccode\u003eScatterObject\u003c/code\u003e also received a \u003ccode\u003eScriptable Tool\u003c/code\u003e mode after its initial release, as did the spline-based and angle-based layouts.\u003c/p\u003e\n\n\u003cp\u003ePlacement is controlled by multiple exclusion methods, including Spline, Grid, and Landscape Layer exclusion. These let a scatter setup respect specific areas defined in the scene or Landscape rather than covering everything uniformly. The exclusion methods work alongside the scatter functions, so defined zones can be kept clear instead of being covered uniformly.\u003c/p\u003e\n\n\u003cp\u003e2 Scriptable Tools handle broader workflows. The \u003ccode\u003ePCG ↔ Foliage Workflow\u003c/code\u003e connects PCG-generated results to the engine's Foliage system, and the \u003ccode\u003eS-PCGPaint Canvas Tool\u003c/code\u003e provides a paint-style canvas for working with PCG. Both exist in Scriptable Tool form, which is why enabling the Scriptable Tools plugins matters even if the base scatter functions seem sufficient at first.\u003c/p\u003e\n\n\u003ch3\u003ePractical Grouping of the Placement Modes\u003c/h3\u003e\n\n\u003cp\u003eViewed by task, \u003ccode\u003eMeshProjection\u003c/code\u003e and \u003ccode\u003eSnowProjection\u003c/code\u003e cover surface dressing and seasonal coverage, the scatter modes handle Mesh, Spline, and angular placement, and the vine-and-cable simulation deals with objects along extended linear or hanging structures. The exclusion methods protect areas the user defines through Splines, Grids, or Landscape Layers, and the Foliage workflow moves generated output into the engine's Foliage pipeline for further editing.\u003c/p\u003e\n\n\u003ch2\u003eEnabling Scriptable Tools and Required Plugins Before First Use\u003c/h2\u003e\n\n\u003cp\u003eSetup starts in the Plugin Manager. Before using the tool, open \u003ccode\u003eEdit\u003c/code\u003e \u003e \u003ccode\u003ePlugins\u003c/code\u003e and enable \u003ccode\u003eGeometry Script\u003c/code\u003e, \u003ccode\u003ePCG\u003c/code\u003e, \u003ccode\u003ePCGExternalDataInterop\u003c/code\u003e, and \u003ccode\u003ePCGGeometryScriptInterop\u003c/code\u003e. If the Scriptable Tool versions of the functions are needed, enable \u003ccode\u003eScriptable Tools Editor Mode\u003c/code\u003e and \u003ccode\u003eScriptable Tools Framework\u003c/code\u003e as well.\u003c/p\u003e\n\n\u003cp\u003eThe engine must be restarted after enabling the required plugins. From there, the usage flow follows a small set of steps:\u003c/p\u003e\n\n\u003col\u003e\n \u003cli\u003eOpen the PCG documentation Level and read the relevant Blueprint information and examples.\u003c/li\u003e\n \u003cli\u003eFind the required Blueprint and drag it into the scene.\u003c/li\u003e\n \u003cli\u003eAdjust parameters as needed—different Blueprints have different parameters.\u003c/li\u003e\n \u003cli\u003eBake the Mesh if the function supports it.\u003c/li\u003e\n\u003c/ol\u003e\n\n\u003cp\u003eThe documentation Level is the practical entry point. It holds the Blueprint information and examples that the Showcase video cannot cover, and it is also where the few included models and textures live. Some Blueprints may require Nanite, so the geometry used with those Blueprints has to be compatible with that workflow.\u003c/p\u003e\n\n\u003ch2\u003eWhat the Pack Ships: A Documentation Level, Blueprints, and Sample Assets\u003c/h2\u003e\n\n\u003cp\u003eThe package is licensed under Creative Commons Attribution and is presented as images and movies. Its content boundaries are stated clearly: \u003cem\u003eMegascans\u003c/em\u003e assets and textures are not included, and the models and textures that appear in the Showcase are not part of the pack. The documentation Level contains only a few models and textures, all created by the developer. Similar textures can be found on \u003cem\u003eQuixel Megascans\u003c/em\u003e, \u003cem\u003ePoly Haven\u003c/em\u003e, and \u003cem\u003eNoisecreater\u003c/em\u003e.\u003c/p\u003e\n\n\u003cp\u003eThat makes this a workflow tool rather than a content library. The user brings the geometry, models, and textures; the Blueprints supply the scattering logic, projection behavior, exclusion rules, and Foliage bridging on top. Because everything is built from UE5's own PCG and Blueprints, the functions stay editable inside the Editor, and the Creative Commons Attribution license keeps the Blueprints reusable with credit.\u003c/p\u003e\n\n\u003cp\u003eEnvironment artists and Technical Artists already working in Unreal Engine 5.6+ will get the most direct use from V1.7. The tool extends the engine's procedural tools with ready-made Blueprints while staying inside the standard PCG workflow. The documentation Level shortens the initial setup, the licensing leaves room to adapt the Blueprints in your own work, and the planned stream of future Blueprint updates gives the tool room to grow alongside the projects that adopt it.\u003c/p\u003e\n\n\u003ch2\u003eRelated Resources Worth Checking\u003c/h2\u003e\n\u003cul\u003e\n\u003cli\u003e\u003ca href=\"https://3dcghub.com/procedural-mesh-blueprint/\" title=\"Procedural Mesh Blueprint\"\u003eProcedural Mesh Blueprint\u003c/a\u003e\u003c/li\u003e\n\u003cli\u003e\u003ca href=\"https://3dcghub.com/calysto-village-procedural-villages-farms-with-pcg/\" title=\"Calysto Village Procedural villages, farms with PCG\"\u003eCalysto Village Procedural villages, farms with PCG\u003c/a\u003e\u003c/li\u003e\n\u003cli\u003e\u003ca href=\"https://3dcghub.com/autoenv-procedural-rock-cliffs/\" title=\"AutoEnv Procedural Rock Cliffs\"\u003eAutoEnv Procedural Rock Cliffs\u003c/a\u003e\u003c/li\u003e\n\u003cli\u003e\u003ca href=\"https://3dcghub.com/ultra-dynamic-sky/\" title=\"Ultra Dynamic Sky\"\u003eUltra Dynamic Sky\u003c/a\u003e\u003c/li\u003e\n\u003cli\u003e\u003ca href=\"https://3dcghub.com/procedural-ivy-generator/\" title=\"Procedural Ivy Generator\"\u003eProcedural Ivy Generator\u003c/a\u003e\u003c/li\u003e\n\u003c/ul\u003e","contentTextLength":6166,"navigation":{"current":387,"total":3159,"previous":{"id":"1000856","slug":"nature-water-fx","title":"Nature Water FX","category":"Liquid","platform":"Unreal Engine","updatedAt":"2026-08-04T17:08:20.756Z"},"next":{"id":"1000854","slug":"multiplayer-traps-pack","title":"Multiplayer Traps Pack","category":"Gameplay Features","platform":"Unreal Engine","updatedAt":"2026-08-04T16:58:03.710Z"}},"relatedResources":[{"id":"1001118","slug":"pcg-geometry-decals","title":"PCG Geometry Decals","category":"Procedural Systems","engine":"5.5+","assetVersion":"","engineVersion":"Engine Version: 5.5+","tag":"Procedural Systems","accent":"blue","visual":"mech","summary":"Terrain-conforming PCG decals for Unreal landscapes with heightmap-driven displacement, full Details panel control, and a bake path to Nanite static meshes.","platform":"Unreal Engine","publishedAt":"2026-09-07T12:52:22.101Z","updatedAt":"2026-09-07T12:52:22.101Z","sourceNotes":[],"fileContents":[],"compatibility":["Unreal Engine","Engine Version: 5.5+"],"featuredImage":{"alt":"PCG Geometry Decals","src":"/wp-content/uploads/published/2026/09/eb259e96f79a-fa2bb67a-495b-4190-89b7-3a6b6c873518-808b1ade5a.webp"},"hasDownloadLink":true,"downloads":0},{"id":"27443","slug":"procedural-mesh-blueprint","title":"Procedural Mesh Blueprint","category":"Procedural Systems","engine":"V2","assetVersion":"Engine version: 5.4+","engineVersion":"Asset Version: V2","tag":"Procedural Systems","accent":"blue","visual":"animation","summary":"Procedural Mesh Blueprint uses PCG to place child meshes on a parent mesh with a drag-and-drop workflow for environment artists. It focuses on overgrown details such as moss, grass, ivy, vines, and roots, while also supporting conversion back to static meshes.","platform":"Unreal Engine","publishedAt":"2026-04-25T12:18:37.000Z","updatedAt":"2026-07-05T06:17:14.277Z","sourceNotes":[],"fileContents":[],"compatibility":["Unreal Engine","Engine version: 5.4+","Asset Version: V2"],"featuredImage":{"alt":"Procedural Mesh Blueprint","src":"https://3dcghub.com/wp-content/uploads/2026/04/9f239b1c495b_e8794242-68b2-45e1-84c7-de84a7b8a153.webp"},"hasDownloadLink":true,"downloads":0},{"id":"11470","slug":"calysto-village-procedural-villages-farms-with-pcg","title":"Calysto Village Procedural villages, farms with PCG","category":"Procedural Systems","engine":"5.3+","assetVersion":"Engine version: 5.3+","engineVersion":"5.4","tag":"Procedural Systems","accent":"blue","visual":"animation","summary":"Streamline your level design with Calysto Village, a procedural tool for creating detailed villages and farms. Leverage the power of PCG and World Partition to build massive, high-performance environments with ease.","platform":"Unreal Engine","publishedAt":"2026-03-05T17:27:28.000Z","updatedAt":"2026-04-19T15:48:12.000Z","sourceNotes":[],"fileContents":[],"compatibility":["Unreal Engine","Engine version: 5.3+"],"featuredImage":{"alt":"Calysto Village Procedural villages, farms with PCG","src":"https://3dcghub.com/wp-content/uploads/2026/03/c9af98d7-f979-466d-a8d7-7720567e386e.webp"},"hasDownloadLink":true,"downloads":1}]}
Procedural Systems
Natural PCG Tools
UE5.6+ procedural tool built on PCG and blueprints. Version 1.7 adds mesh and snow projection, spline scattering, exclusion, and scriptable tool modes.
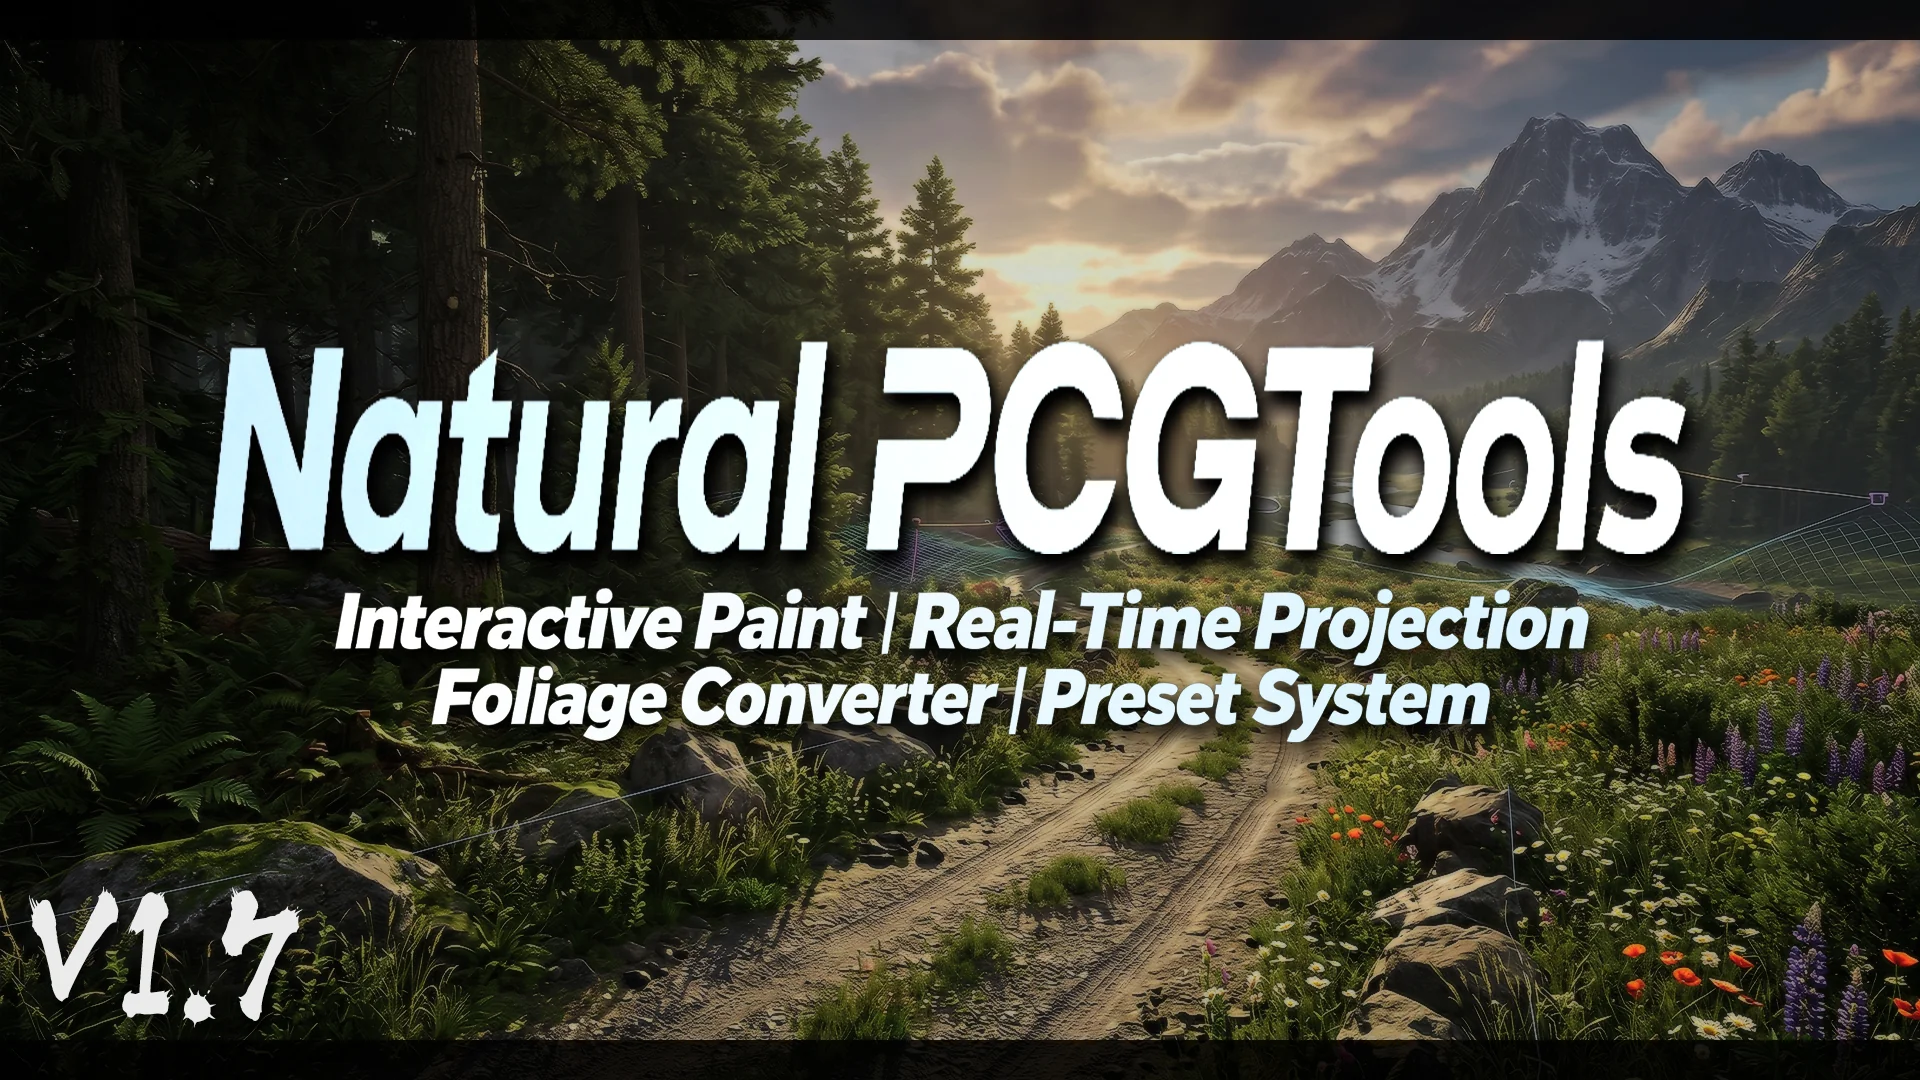
Natural PCG Tools runs on the Procedural Content Generation (PCG) system and Blueprints built into Unreal Engine 5 (UE5), extending the engine's native procedural workflow instead of replacing it. The tool is aimed at environment construction: placing props across terrain, projecting geometry onto Meshes, adding snow coverage, and keeping scattered objects inside or outside user-defined areas. The current release is V1.7, and from V1.7 onwards, only Unreal Engine 5.6 (UE5.6) and newer is supported.
The V1.7 Showcase video demonstrates only a portion of the feature set; the documentation supplied with the tool provides more comprehensive explanations and examples. More PCG Blueprints are planned for future updates, with additions or optimizations arriving over time. That makes the tool a moving target in a good sense—the function list in V1.7 is the starting point, not the ceiling.
Because everything runs through UE5's PCG and Blueprints, the tool stays close to the engine's own logic. There is no separate runtime to learn, and the Blueprints can be opened, inspected, and adapted like any other procedural setup in the Editor.
V1.7's Scattering and Projection Tools, Grouped by Job
The current function list splits into projection, scatter placement, exclusion, and scriptable editing tools.
MeshProjection and SnowProjection were both added in V2. The 1st projects objects onto Mesh surfaces, which suits placing geometry on uneven or complex surfaces. The 2nd applies the same idea to snow, generating snow coverage across a scene for winter or weather-driven environments. Projection aligns the generated objects with the surface they land on, which is what separates these 2 functions from the scatter group.
The scatter functions cover a wider range of layout patterns. Scatter Objects on a Mesh distributes objects across a Mesh surface. The spline-based options scatter objects along a Spline, scatter objects within a Spline, and scatter objects at any angle. A dedicated mode simulates scattering objects on vines or cables; that mode is only available in Scriptable Tool mode. ScatterObject also received a Scriptable Tool mode after its initial release, as did the spline-based and angle-based layouts.
Placement is controlled by multiple exclusion methods, including Spline, Grid, and Landscape Layer exclusion. These let a scatter setup respect specific areas defined in the scene or Landscape rather than covering everything uniformly. The exclusion methods work alongside the scatter functions, so defined zones can be kept clear instead of being covered uniformly.
2 Scriptable Tools handle broader workflows. The PCG ↔ Foliage Workflow connects PCG-generated results to the engine's Foliage system, and the S-PCGPaint Canvas Tool provides a paint-style canvas for working with PCG. Both exist in Scriptable Tool form, which is why enabling the Scriptable Tools plugins matters even if the base scatter functions seem sufficient at first.
Practical Grouping of the Placement Modes
Viewed by task, MeshProjection and SnowProjection cover surface dressing and seasonal coverage, the scatter modes handle Mesh, Spline, and angular placement, and the vine-and-cable simulation deals with objects along extended linear or hanging structures. The exclusion methods protect areas the user defines through Splines, Grids, or Landscape Layers, and the Foliage workflow moves generated output into the engine's Foliage pipeline for further editing.
Enabling Scriptable Tools and Required Plugins Before First Use
Setup starts in the Plugin Manager. Before using the tool, open Edit > Plugins and enable Geometry Script, PCG, PCGExternalDataInterop, and PCGGeometryScriptInterop. If the Scriptable Tool versions of the functions are needed, enable Scriptable Tools Editor Mode and Scriptable Tools Framework as well.
The engine must be restarted after enabling the required plugins. From there, the usage flow follows a small set of steps:
Open the PCG documentation Level and read the relevant Blueprint information and examples.
Find the required Blueprint and drag it into the scene.
Adjust parameters as needed—different Blueprints have different parameters.
Bake the Mesh if the function supports it.
The documentation Level is the practical entry point. It holds the Blueprint information and examples that the Showcase video cannot cover, and it is also where the few included models and textures live. Some Blueprints may require Nanite, so the geometry used with those Blueprints has to be compatible with that workflow.
What the Pack Ships: A Documentation Level, Blueprints, and Sample Assets
The package is licensed under Creative Commons Attribution and is presented as images and movies. Its content boundaries are stated clearly: Megascans assets and textures are not included, and the models and textures that appear in the Showcase are not part of the pack. The documentation Level contains only a few models and textures, all created by the developer. Similar textures can be found on Quixel Megascans, Poly Haven, and Noisecreater.
That makes this a workflow tool rather than a content library. The user brings the geometry, models, and textures; the Blueprints supply the scattering logic, projection behavior, exclusion rules, and Foliage bridging on top. Because everything is built from UE5's own PCG and Blueprints, the functions stay editable inside the Editor, and the Creative Commons Attribution license keeps the Blueprints reusable with credit.
Environment artists and Technical Artists already working in Unreal Engine 5.6+ will get the most direct use from V1.7. The tool extends the engine's procedural tools with ready-made Blueprints while staying inside the standard PCG workflow. The documentation Level shortens the initial setup, the licensing leaves room to adapt the Blueprints in your own work, and the planned stream of future Blueprint updates gives the tool room to grow alongside the projects that adopt it.
 Procedural Systems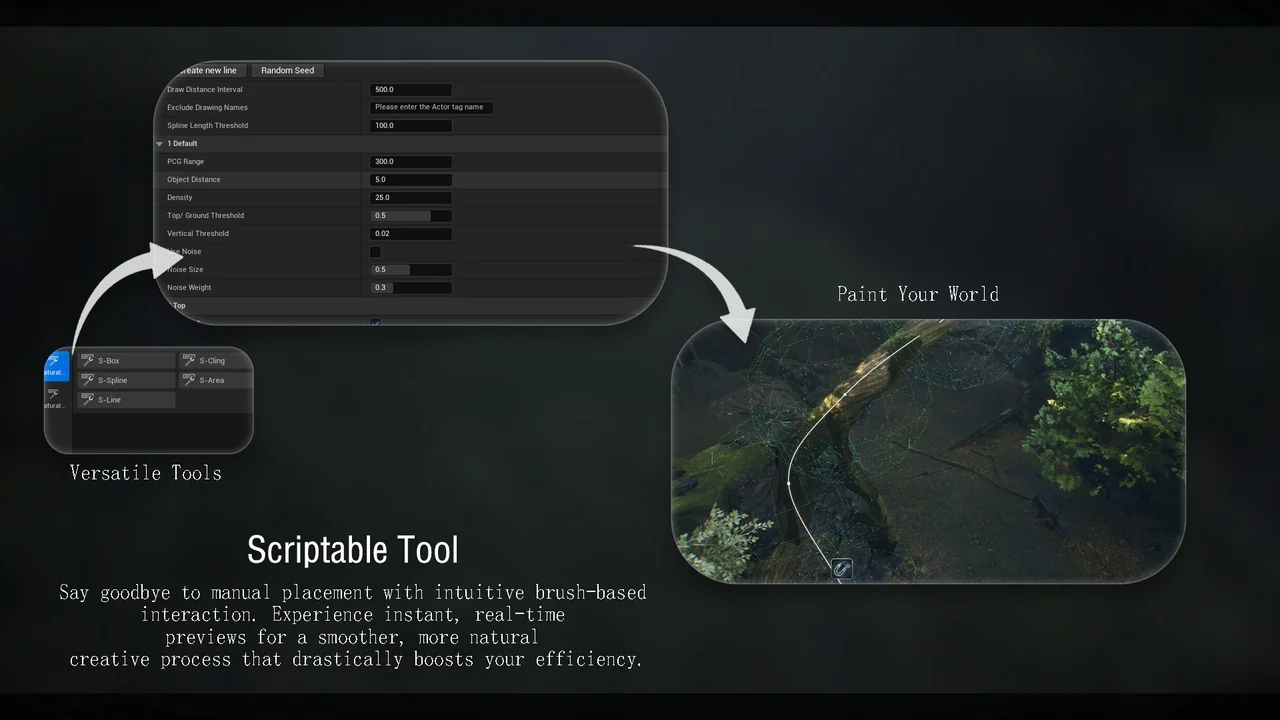
 Procedural Systems
 Procedural Systems
 Procedural Systems