"a338a1d501976271"{"id":"1001000","slug":"lens-and-film-post-process","title":"Lens and Film Post Process","category":"Shaders","engine":"5.1+","assetVersion":"","engineVersion":"Engine Version: 5.1+","tag":"Shaders","accent":"blue","visual":"mech","summary":"Customizable post-processing effect for blur, lens distortion, chromatic aberration, film grain, light leaks, and more. Includes disk blur types and cinematic r","platform":"Unreal Engine","publishedAt":"2026-08-20T09:55:15.932Z","updatedAt":"2026-08-20T09:55:15.932Z","sourceNotes":[],"fileContents":[],"compatibility":["Unreal Engine","Engine Version: 5.1+"],"featuredImage":{"alt":"Lens and Film Post Process","src":"/wp-content/uploads/published/2026/08/9f516287e615-b76a2f41-7419-402c-9096-7d1b7d173679-78137b7b8c.webp"},"hasDownloadLink":true,"downloads":0,"terms":[{"taxonomy":"category","slug":"shaders","name":"Shaders"}],"galleryImages":[{"src":"/wp-content/uploads/published/2026/08/919070c22152-1aa7d1c8-daba-4f0c-b4b9-ce6da5ddfa66-3cea60f5fa.webp","alt":"Lens and Film Post Process"},{"src":"/wp-content/uploads/published/2026/08/3d7178c2ada4-65cea5e9-85da-4f54-9185-6b880d3d0f27-79853cf59d.webp","alt":"Lens and Film Post Process"},{"src":"/wp-content/uploads/published/2026/08/04ba523838e1-405814df-2d8e-4e23-9312-5bd2e418f17a-21e2eb8da6.webp","alt":"Lens and Film Post Process"},{"src":"/wp-content/uploads/published/2026/08/39cc5aa64835-2c212609-76e6-4a57-a887-b9cfe49f64ec-a1f39895e1.webp","alt":"Lens and Film Post Process"},{"src":"/wp-content/uploads/published/2026/08/a118b9edde6b-497cf674-5737-4f7a-93e5-7e3c89df7d24-1d0a07dc3e.webp","alt":"Lens and Film Post Process"},{"src":"/wp-content/uploads/published/2026/08/013121553e3c-094e2cfc-c50d-4bd6-add7-70690b6608f6-e24c3f7220.webp","alt":"Lens and Film Post Process"},{"src":"/wp-content/uploads/published/2026/08/f9d2bd08ee53-0c428a12-363a-4a22-843e-aa96d56166c4-0a37fbf268.webp","alt":"Lens and Film Post Process"},{"src":"/wp-content/uploads/published/2026/08/e2465360ee7c-70b16751-c873-493e-832e-b5fa6ab19edd-6cfcc4b5ee.webp","alt":"Lens and Film Post Process"}],"accessPanel":{"kind":"resource","title":"Download this resource","eyebrow":"Free Download","message":"Log in or create a free account to start your download.","fileName":"Lens and Film Post Process.7z","safetyNote":"Resources are manually reviewed before listing to improve quality and reduce obvious risks.","actionLabel":"Download Free","resourceType":"Resource archive"},"contentHtml":"\u003cp\u003eWhen a render needs to feel less like a flat digital image and more like it was captured through glass, the usual approach is to chain together several post-process materials. Lens and Film Post Process takes a different route: it bundles peripheral blur, unsharp masking, lens distortion, chromatic aberration, film grain, light leaks, and several color adjustments into one material. Each artifact has its own controls, so you can dial in a single lens look instead of orchestrating multiple effects.\u003c/p\u003e\u003cp\u003eThe most recent update cycle has made the material more production-friendly. The 2408 update enables Expose to Cinematics by default for every editable variable, which means any of these parameters can be animated directly in Sequencer or a cinematic track. The 2212 update added a Blur Type parameter and a runtime update flag. Together, these changes turn the package from a static correction stack into a real-time lens simulation tool.\u003c/p\u003e\u003ch2\u003eDisk Blur Types and the Blur Type Parameter\u003c/h2\u003e\u003cp\u003eBlur is a core part of the lens look. The peripheral blur option simulates the soft edges that occur when the lens focal plane is shallow. With the 2212 expansion, the blur system now supports three disk-based variants: Disk Blur Regular, Disk Blur Gaussian, and Disk Blur Hemisphere. These are different from the original blur in that they are structured through a disk-shaped bokeh, which gives a more natural rendering of out-of-focus highlights. According to the update notes, the disk blur types provide better quality and better performance at the same time, which is an unusual combination.\u003c/p\u003e\u003cp\u003eThe Blur Type parameter is used to select between these modes. The prior blur is still available and is labeled \"Regular (old)\" in the parameter list. This preserves the exact look that projects already scheduled. For new work, the disk blur variants are likely the smarter starting point, especially if the scene contains many specular highlights or light sources that will be blurred.\u003c/p\u003e\u003ch2\u003eChromatic Aberration with Three Color Pair Controls\u003c/h2\u003e\u003cp\u003eChromatic aberration is the color fringing that appears along high-contrast edges when a lens fails to focus all wavelengths to the same point. The effect exposes separate adjustments for three color pairs: Red/Cyan, Green/Magenta, and Blue/Yellow. This three-channel control is more granular than a single aberration slider. You can create a subtle separation that mimics a real cine lens, or push it hard for a stylized glitch effect. Independent pair controls also help when matching a specific reference plate, because each color fringe may need a different intensity.\u003c/p\u003e\u003ch2\u003eBarrel and Pincushion Lens Distortion\u003c/h2\u003e\u003cp\u003eGeometric distortion is handled through two classic shapes: barrel and pincushion. Barrel distortion pushes the image outward, making straight lines at the edges appear to bow out. Pincushion distortion pulls the edges in, creating an inward pinch. These are useful for recreating the personality of a wide-angle lens or a telephoto lens, respectively. The material lets you switch between the two and set a magnitude. When combined with the blur and chromatic aberration, the effect can simulate a complete lens signature rather than just one artifact.\u003c/p\u003e\u003ch2\u003eFilm Grain, Film Grunge, and Noise-Based Light Leaks\u003c/h2\u003e\u003cp\u003eThe film layer of the effect starts with a color film grain generated from a white noise texture. Because the grain is colored rather than a uniform gray overlay, it can match the organic grain of a particular film stock. Film grunge adds a dirty, scratched surface on top of the frame, which is a different effect from grain: it appears as uneven stains or dust patterns. Light leaks are also noise-based, producing drifting, luminous patches that emulate light entering the camera body through a seam or pinhole. These three components are all driven by noise, so they evolve over time and never look like a static texture pasted on the screen.\u003c/p\u003e\u003ch2\u003eShadow Saturation and Black-and-White with Color Adjustment\u003c/h2\u003e\u003cp\u003eOn the color side, the material includes a Drop Saturation in Shadows control. This pulls chroma out of the darkest parts of the image, which is a common filmic look: shadows become neutral, and colors appear to emerge from the highlights and midtones. The black-and-white option is not a simple desaturation. It provides a color adjustment mechanism, so different wavelengths can be mapped to different shades of gray. That lets you create a pleasing monochrome image with control over how reds, greens, and blues contribute to the final brightness.\u003c/p\u003e\u003ch2\u003eRuntime Updates and Cinematic Exposure\u003c/h2\u003e\u003cp\u003eFor live projects, the Update at Runtime parameter is essential. It lets the post-process material respond to changing conditions during gameplay or on a shoot. For example, a lens flare or a light leak may need to intensify as a character moves into a bright area. With runtime updates enabled, the noise-based effects can be recalculated each frame rather than baked once. The Expose to Cinematics default means that animating any of these variables in Sequencer does not require manual blueprint wiring or material parameter collection setup. A cinematographer can keyframe the blur radius, the aberration strength, or the grain intensity directly on a track.\u003c/p\u003e\u003cp\u003eCompatibility with Decal Constructor is noted, which suggests the same post-process logic can be applied to decal materials. That is useful for scenarios where a decal needs to carry the same optical treatment as the main camera view, such as a projected shadow with lens distortion or a film-grain overlay on a surface. This broadens the application beyond the main view and into scene elements that need to match the overall look.\u003c/p\u003e\u003cp\u003eThe main takeaway is that Lens and Film Post Process is a concentrated kit for cinematic post work. It leaves the usual texture and color settings exposed, and the recent updates make it easier to use in a timed sequence. For teams that want a reliable way to add lens character to a game, a cutscene, or a virtual production setup, this is a package that can be plugged into a material slot and adjusted to taste.\u003c/p\u003e\n\n\u003ch2\u003eRelated Resources Worth Checking\u003c/h2\u003e\n\u003cul\u003e\n\u003cli\u003e\u003ca href=\"https://3dcghub.com/post-process-shader-world-effect/\" title=\"Post Process Shader - World Effect\"\u003ePost Process Shader - World Effect\u003c/a\u003e\u003c/li\u003e\n\u003cli\u003e\u003ca href=\"https://3dcghub.com/post-process-shader-scan-effect/\" title=\"Post Process Shader - Scan Effect\"\u003ePost Process Shader - Scan Effect\u003c/a\u003e\u003c/li\u003e\n\u003cli\u003e\u003ca href=\"https://3dcghub.com/post-process-pro-pack/\" title=\"Post Process Pro Pack\"\u003ePost Process Pro Pack\u003c/a\u003e\u003c/li\u003e\n\u003cli\u003e\u003ca href=\"https://3dcghub.com/art-of-shader-distortion-and-glitches/\" title=\"Art Of Shader - Distortion And Glitches\"\u003eArt Of Shader - Distortion And Glitches\u003c/a\u003e\u003c/li\u003e\n\u003cli\u003e\u003ca href=\"https://3dcghub.com/imperfecter-post-process-toolkit/\" title=\"IMPERFECTER - Post Process Toolkit\"\u003eIMPERFECTER - Post Process Toolkit\u003c/a\u003e\u003c/li\u003e\n\u003c/ul\u003e","contentTextLength":6248,"navigation":{"current":454,"total":3338,"previous":{"id":"1001001","slug":"light-military-vehicle","title":"Light Military Vehicle","category":"Military","platform":"Unreal Engine","updatedAt":"2026-08-20T10:04:53.165Z"},"next":{"id":"1000999","slug":"landscaping-small-trees-1","title":"Landscaping Small Trees 1","category":"Trees","platform":"Unreal Engine","updatedAt":"2026-08-19T16:12:52.291Z"}},"relatedResources":[{"id":"1000867","slug":"post-process-shader-scan-effect","title":"Post Process Shader - Scan Effect","category":"Shaders","engine":"5.0+","assetVersion":"","engineVersion":"Engine Version: 5.0+","tag":"Shaders","accent":"blue","visual":"mech","summary":"A UE5 post-process shader that creates glowing scan outlines on object edges and surfaces, with full color, thickness, and glow control. Works in any lighting.","platform":"Unreal Engine","publishedAt":"2026-08-05T06:50:02.101Z","updatedAt":"2026-08-05T06:50:02.101Z","sourceNotes":[],"fileContents":[],"compatibility":["Unreal Engine","Engine Version: 5.0+"],"featuredImage":{"alt":"Post Process Shader - Scan Effect","src":"/wp-content/uploads/published/2026/08/9d1030c573cf-ea53a9c9-7dac-4928-b85c-12f5e688203a-4ac07b0456.webp"},"hasDownloadLink":true,"downloads":1},{"id":"1000868","slug":"post-process-shader-world-effect","title":"Post Process Shader - World Effect","category":"Shaders","engine":"5.0+","assetVersion":"","engineVersion":"Engine Version: 5.0+","tag":"Shaders","accent":"blue","visual":"mech","summary":"A post-processing shader for Unreal Engine 5 that creates atmospheric and eerie visuals—fog, glow, distortion, color filters—with fully adjustable parameters an","platform":"Unreal Engine","publishedAt":"2026-08-05T06:52:48.407Z","updatedAt":"2026-08-05T06:52:48.407Z","sourceNotes":[],"fileContents":[],"compatibility":["Unreal Engine","Engine Version: 5.0+"],"featuredImage":{"alt":"Post Process Shader - World Effect","src":"/wp-content/uploads/published/2026/08/74d3c34c609f-04e864c3-4d40-4a94-a958-896d7bdc2d3a-f95815c78c.webp"},"hasDownloadLink":true,"downloads":0},{"id":"15922","slug":"post-process-pro-pack","title":"Post Process Pro Pack","category":"Shaders","engine":"5.2+","assetVersion":"Engine version: 5.2+","engineVersion":"4.25","tag":"Shaders","accent":"blue","visual":"animation","summary":"Enhance your project's visuals with the Post Process Pro Pack. This collection features customizable master materials, 34 LUT files, and a bonus stylized water material.","platform":"Unreal Engine","publishedAt":"2026-03-12T13:29:14.000Z","updatedAt":"2026-04-19T15:44:39.000Z","sourceNotes":[],"fileContents":[],"compatibility":["Unreal Engine","Engine version: 5.2+"],"featuredImage":{"alt":"Post Process Pro Pack","src":"https://3dcghub.com/wp-content/uploads/2026/03/5547d228-7286-422e-8e00-494312ae8338.webp"},"hasDownloadLink":true,"downloads":2}]}
Shaders
Lens and Film Post Process
Customizable post-processing effect for blur, lens distortion, chromatic aberration, film grain, light leaks, and more. Includes disk blur types and cinematic r
Category:Unreal Engine,ShadersPlatform: Unreal EngineEngine Version: 5.1+Published: Aug 20, 2026
Shaders
Resource overview
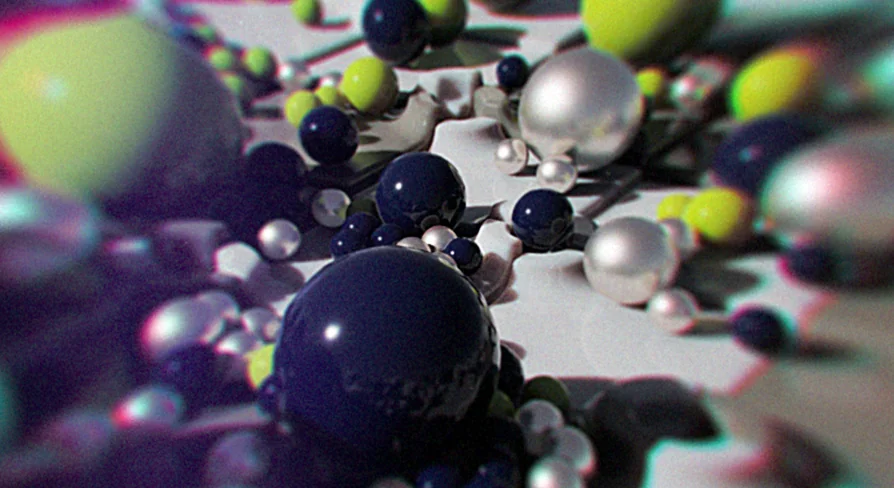
When a render needs to feel less like a flat digital image and more like it was captured through glass, the usual approach is to chain together several post-process materials. Lens and Film Post Process takes a different route: it bundles peripheral blur, unsharp masking, lens distortion, chromatic aberration, film grain, light leaks, and several color adjustments into one material. Each artifact has its own controls, so you can dial in a single lens look instead of orchestrating multiple effects.
The most recent update cycle has made the material more production-friendly. The 2408 update enables Expose to Cinematics by default for every editable variable, which means any of these parameters can be animated directly in Sequencer or a cinematic track. The 2212 update added a Blur Type parameter and a runtime update flag. Together, these changes turn the package from a static correction stack into a real-time lens simulation tool.
Disk Blur Types and the Blur Type Parameter
Blur is a core part of the lens look. The peripheral blur option simulates the soft edges that occur when the lens focal plane is shallow. With the 2212 expansion, the blur system now supports three disk-based variants: Disk Blur Regular, Disk Blur Gaussian, and Disk Blur Hemisphere. These are different from the original blur in that they are structured through a disk-shaped bokeh, which gives a more natural rendering of out-of-focus highlights. According to the update notes, the disk blur types provide better quality and better performance at the same time, which is an unusual combination.
The Blur Type parameter is used to select between these modes. The prior blur is still available and is labeled "Regular (old)" in the parameter list. This preserves the exact look that projects already scheduled. For new work, the disk blur variants are likely the smarter starting point, especially if the scene contains many specular highlights or light sources that will be blurred.
Chromatic Aberration with Three Color Pair Controls
Chromatic aberration is the color fringing that appears along high-contrast edges when a lens fails to focus all wavelengths to the same point. The effect exposes separate adjustments for three color pairs: Red/Cyan, Green/Magenta, and Blue/Yellow. This three-channel control is more granular than a single aberration slider. You can create a subtle separation that mimics a real cine lens, or push it hard for a stylized glitch effect. Independent pair controls also help when matching a specific reference plate, because each color fringe may need a different intensity.
Barrel and Pincushion Lens Distortion
Geometric distortion is handled through two classic shapes: barrel and pincushion. Barrel distortion pushes the image outward, making straight lines at the edges appear to bow out. Pincushion distortion pulls the edges in, creating an inward pinch. These are useful for recreating the personality of a wide-angle lens or a telephoto lens, respectively. The material lets you switch between the two and set a magnitude. When combined with the blur and chromatic aberration, the effect can simulate a complete lens signature rather than just one artifact.
Film Grain, Film Grunge, and Noise-Based Light Leaks
The film layer of the effect starts with a color film grain generated from a white noise texture. Because the grain is colored rather than a uniform gray overlay, it can match the organic grain of a particular film stock. Film grunge adds a dirty, scratched surface on top of the frame, which is a different effect from grain: it appears as uneven stains or dust patterns. Light leaks are also noise-based, producing drifting, luminous patches that emulate light entering the camera body through a seam or pinhole. These three components are all driven by noise, so they evolve over time and never look like a static texture pasted on the screen.
Shadow Saturation and Black-and-White with Color Adjustment
On the color side, the material includes a Drop Saturation in Shadows control. This pulls chroma out of the darkest parts of the image, which is a common filmic look: shadows become neutral, and colors appear to emerge from the highlights and midtones. The black-and-white option is not a simple desaturation. It provides a color adjustment mechanism, so different wavelengths can be mapped to different shades of gray. That lets you create a pleasing monochrome image with control over how reds, greens, and blues contribute to the final brightness.
Runtime Updates and Cinematic Exposure
For live projects, the Update at Runtime parameter is essential. It lets the post-process material respond to changing conditions during gameplay or on a shoot. For example, a lens flare or a light leak may need to intensify as a character moves into a bright area. With runtime updates enabled, the noise-based effects can be recalculated each frame rather than baked once. The Expose to Cinematics default means that animating any of these variables in Sequencer does not require manual blueprint wiring or material parameter collection setup. A cinematographer can keyframe the blur radius, the aberration strength, or the grain intensity directly on a track.
Compatibility with Decal Constructor is noted, which suggests the same post-process logic can be applied to decal materials. That is useful for scenarios where a decal needs to carry the same optical treatment as the main camera view, such as a projected shadow with lens distortion or a film-grain overlay on a surface. This broadens the application beyond the main view and into scene elements that need to match the overall look.
The main takeaway is that Lens and Film Post Process is a concentrated kit for cinematic post work. It leaves the usual texture and color settings exposed, and the recent updates make it easier to use in a timed sequence. For teams that want a reliable way to add lens character to a game, a cutscene, or a virtual production setup, this is a package that can be plugged into a material slot and adjusted to taste.
 Shaders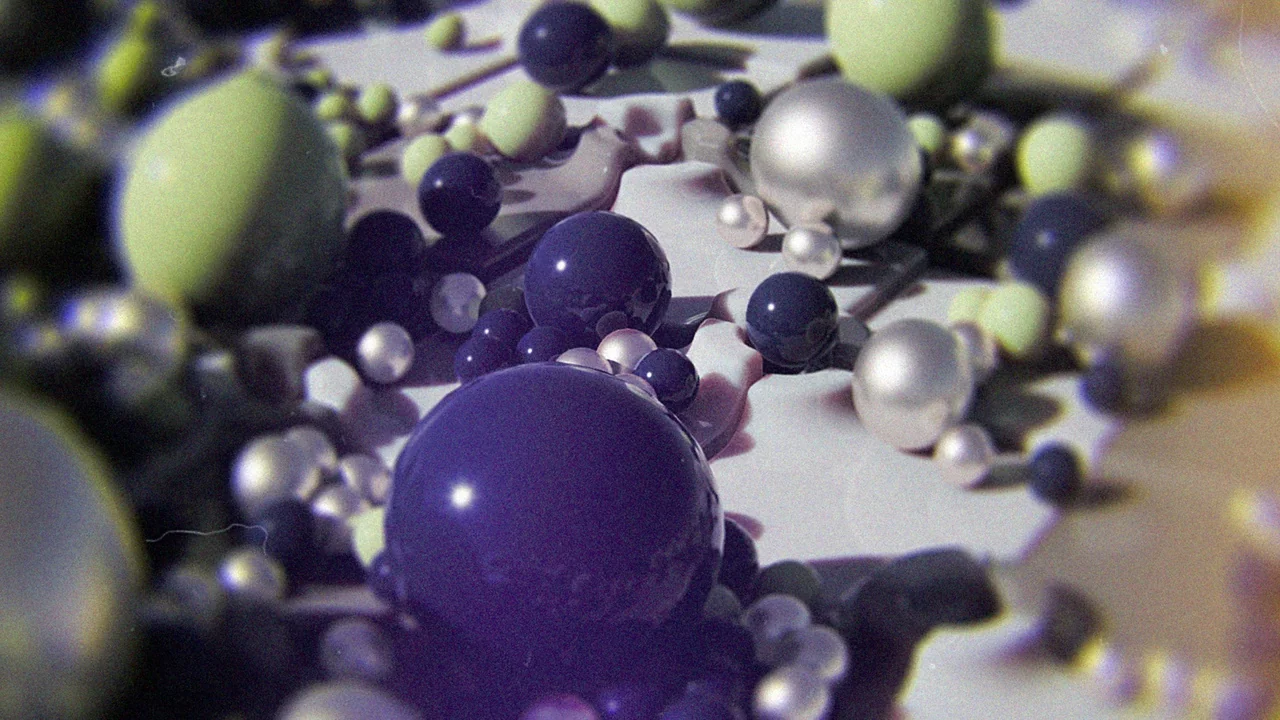
 Shaders
 Shaders
 Shaders