"a7cfa646d0d8ae55"{"id":"1000867","slug":"post-process-shader-scan-effect","title":"Post Process Shader - Scan Effect","category":"Shaders","engine":"5.0+","assetVersion":"","engineVersion":"Engine Version: 5.0+","tag":"Shaders","accent":"blue","visual":"mech","summary":"A UE5 post-process shader that creates glowing scan outlines on object edges and surfaces, with full color, thickness, and glow control. Works in any lighting.","platform":"Unreal Engine","publishedAt":"2026-08-05T06:50:02.101Z","updatedAt":"2026-08-05T06:50:02.101Z","sourceNotes":[],"fileContents":[],"compatibility":["Unreal Engine","Engine Version: 5.0+"],"featuredImage":{"alt":"Post Process Shader - Scan Effect","src":"/wp-content/uploads/published/2026/08/9d1030c573cf-ea53a9c9-7dac-4928-b85c-12f5e688203a-4ac07b0456.webp"},"hasDownloadLink":true,"downloads":1,"terms":[{"taxonomy":"category","slug":"shaders","name":"Shaders"}],"galleryImages":[{"src":"/wp-content/uploads/published/2026/08/b9b813d33d82-0f6d6253-2055-4c1d-a802-481950f2aa44-54b62513b0.webp","alt":"Post Process Shader - Scan Effect"},{"src":"/wp-content/uploads/published/2026/08/38de2908413e-d96270e3-f212-4f10-8b41-13d2be050b87-917d221eab.webp","alt":"Post Process Shader - Scan Effect"},{"src":"/wp-content/uploads/published/2026/08/7c663b0cb577-ab2851cb-c5bd-4ad1-a2b6-b267fb7c2331-84adb9a284.webp","alt":"Post Process Shader - Scan Effect"},{"src":"/wp-content/uploads/published/2026/08/8dff8f14f023-5651196d-5086-4c4a-beec-928830c57f16-d8b41836c6.webp","alt":"Post Process Shader - Scan Effect"},{"src":"/wp-content/uploads/published/2026/08/28ec8ed4c183-2cd296f5-2fa3-4239-90d0-643d52116ec1-bd8499c848.webp","alt":"Post Process Shader - Scan Effect"},{"src":"/wp-content/uploads/published/2026/08/0c9f24dc6816-941acaa5-8034-4771-b6f2-1d77136b8cb9-cd795fb2c0.webp","alt":"Post Process Shader - Scan Effect"},{"src":"/wp-content/uploads/published/2026/08/8e87cb48c5b8-9e28e160-c884-42f3-a2b9-d86dec50213d-ab0e11fcd4.webp","alt":"Post Process Shader - Scan Effect"},{"src":"/wp-content/uploads/published/2026/08/9896cdd7eb9e-51c8e591-935f-493a-8a4d-32b865a11a96-c24b24a767.webp","alt":"Post Process Shader - Scan Effect"},{"src":"/wp-content/uploads/published/2026/08/8953621a131d-b939b37f-8bd6-43c1-9ba4-91a4fb1cc3fa-e970e4411b.webp","alt":"Post Process Shader - Scan Effect"},{"src":"/wp-content/uploads/published/2026/08/ce0300f2b25c-fcd6cad5-e985-4314-adff-f00637fe1398-5192817e63.webp","alt":"Post Process Shader - Scan Effect"}],"accessPanel":{"kind":"resource","title":"Download this resource","eyebrow":"Free Download","message":"Log in or create a free account to start your download.","fileName":"Content.7z","safetyNote":"Resources are manually reviewed before listing to improve quality and reduce obvious risks.","actionLabel":"Download Free","resourceType":"Resource archive"},"contentHtml":"\u003cp\u003eIn the middle of a tense sci-fi scene, the moment a device sweeps across a wall and reveals hidden geometry changes the pacing. It is a small visual cue that tells the player exactly what matters. The \u003cem\u003ePost Process Shader - Scan Effect\u003c/em\u003e for Unreal Engine 5 (UE5) turns that cue into a glowing outline around objects, making the scan read clearly against any background.\u003c/p\u003e\n\n\u003ch2\u003eA Post-Process Effect for UE5\u003c/h2\u003e\n\n\u003cp\u003eThis is a Post-Process Shader, which means it works after the main scene is rendered. It scans objects by highlighting their edges and surfaces with a glowing outline. That outline shows the shape of whatever is being examined, so the player immediately sees which object is under inspection.\u003c/p\u003e\n\n\u003cp\u003eThe shader is built to adapt to lighting conditions. Whether the scene is a sunlit exterior or a shadowed corridor, the effect keeps its consistency. Because it is Post-Process, it doesn't rely on the scene's light sources. That leaves a clean outline that does not vary wildly when the camera moves or when lighting changes mid-Level.\u003c/p\u003e\n\n\u003cp\u003eReal-time rendering is a core requirement, and this shader meets it without straining the system. It works during gameplay, so it is suitable for interactive use rather than being limited to baked previews.\u003c/p\u003e\n\n\u003ch2\u003eCustomization: Outline Color, Thickness, and Glow\u003c/h2\u003e\n\n\u003cp\u003eThe scan effect does not lock you into a single look. The developer can adjust the outline color, thickness, glow intensity, and other parameters. These settings give the shader enough range to fit a project's specific art direction. A subtle blue outline works for a calm scanning sequence, while a bright orange sweep can feel urgent and hostile.\u003c/p\u003e\n\n\u003cp\u003eEven beginner developers can approach the settings without getting lost. The shader provides control over the key values clearly, and the notes that accompany the effect point out that the route to a good result is simply tweaking values until they match the project and taste. There is no 1 correct setup; the shader invites experimentation.\u003c/p\u003e\n\n\u003ch2\u003eTriggering the Scan: \u003ccode\u003eQ\u003c/code\u003e and \u003ccode\u003eE\u003c/code\u003e\u003c/h2\u003e\n\n\u003cp\u003eTo see the effect in action quickly, the demonstration uses 2 keyboard keys. \u003ccode\u003eQ\u003c/code\u003e starts the scan animation, and \u003ccode\u003eE\u003c/code\u003e starts the reverse animation. That simple 2-key setup is useful for testing the effect in a Level, and it can be mapped to actual gameplay events such as approaching an object or pressing an interact button.\u003c/p\u003e\n\n\u003cp\u003eThe ability to reverse the animation is a nice touch. It allows the scan to sweep forward and then rewind, which fits User Interface (UI) panels or tech devices that need to re-scan the same area.\u003c/p\u003e\n\n\u003ch2\u003eWhere the Scan Effect Slots In\u003c/h2\u003e\n\n\u003cp\u003eThe shader was designed with several use cases in mind. For science fiction projects, it can be added to drones, robots, or high-tech gadgets that need to identify objects in the world. For exploration games, it gives the player a way to analyze objects or environments and receive a visual reward.\u003c/p\u003e\n\n\u003cp\u003eInteractive projects benefit from the effect too. When players click or touch an object, the scan provides immediate feedback, confirming that the interaction registered. In cinematic scenes, the scan can be used in Cutscenes or trailers to introduce a piece of technology or build tension before a reveal.\u003c/p\u003e\n\n\u003cp\u003eThese scenarios are not mutually exclusive. The same shader can appear in a game's UI, a Cutscene, and a core mechanic, keeping the visual language consistent across the project.\u003c/p\u003e\n\n\u003ch2\u003eLearning from Scratch: Blueprint and Sequencer\u003c/h2\u003e\n\n\u003cp\u003eA tutorial video walks through building a scanning shader from scratch in UE5. It also shows how to integrate the effect with Blueprint and Sequencer. That means developers do not have to treat the shader as a black box. The tutorial explains the logic behind the effect, so it can be adapted to other Post-Process needs or extended with different behaviors.\u003c/p\u003e\n\n\u003cp\u003eFor a developer who wants to use the effect in a Cutscene, Sequencer integration is particularly useful. The shader's reverse animation can be timed to match a camera move or a character's line of dialogue. The tutorial covers this workflow, making it easier to place the scan event at the right moment.\u003c/p\u003e\n\n\u003ch2\u003eSetting Values to Match the Project\u003c/h2\u003e\n\n\u003cp\u003eThe 1 notable instruction in the resource is about parameter adjustment. It notes that the shader allows you to create your own effects by adjusting parameters, and that even beginners can quickly figure out the settings because the key is tweaking values to your taste and style. There is no mandatory preset. That flexibility is what makes the shader useful across very different visual styles.\u003c/p\u003e\n\n\u003cp\u003eIn the end, the \u003cem\u003ePost Process Shader - Scan Effect\u003c/em\u003e is a good fit for a developer who wants a polished scanning effect without spending time on the underlying Post-Process math. The included tutorial and the straightforward controls lower the barrier, while the customization options keep it interesting for more experienced artists.\u003c/p\u003e\n\n\u003ch2\u003eMore From The Same Workflow\u003c/h2\u003e\n\u003cul\u003e\n\u003cli\u003e\u003ca href=\"https://3dcghub.com/post-process-pro-pack/\" title=\"Post Process Pro Pack\"\u003ePost Process Pro Pack\u003c/a\u003e\u003c/li\u003e\n\u003cli\u003e\u003ca href=\"https://3dcghub.com/dissolution-vfx-pack-using-niagara/\" title=\"Dissolution VFX Pack using Niagara\"\u003eDissolution VFX Pack using Niagara\u003c/a\u003e\u003c/li\u003e\n\u003cli\u003e\u003ca href=\"https://3dcghub.com/wall-fx-pack/\" title=\"Wall FX pack\"\u003eWall FX pack\u003c/a\u003e\u003c/li\u003e\n\u003cli\u003e\u003ca href=\"https://3dcghub.com/fluid-portal-vfx-pack/\" title=\"Fluid Portal VFX Pack\"\u003eFluid Portal VFX Pack\u003c/a\u003e\u003c/li\u003e\n\u003cli\u003e\u003ca href=\"https://3dcghub.com/art-of-shader-distortion-and-glitches/\" title=\"Art Of Shader - Distortion And Glitches\"\u003eArt Of Shader - Distortion And Glitches\u003c/a\u003e\u003c/li\u003e\n\u003c/ul\u003e","contentTextLength":4972,"navigation":{"current":383,"total":3167,"previous":{"id":"1000868","slug":"post-process-shader-world-effect","title":"Post Process Shader - World Effect","category":"Shaders","platform":"Unreal Engine","updatedAt":"2026-08-05T06:52:48.407Z"},"next":{"id":"1000866","slug":"poseidon-statues-poseidon-statues-statue-ancient-mythical-roman-prop-3d-art","title":"Poseidon Statues ( Poseidon Statues Statue Ancient Mythical Roman Prop 3D Art )","category":"Art \u0026 Statues","platform":"Unreal Engine","updatedAt":"2026-08-05T06:46:08.835Z"}},"relatedResources":[{"id":"1001000","slug":"lens-and-film-post-process","title":"Lens and Film Post Process","category":"Shaders","engine":"5.1+","assetVersion":"","engineVersion":"Engine Version: 5.1+","tag":"Shaders","accent":"blue","visual":"mech","summary":"Customizable post-processing effect for blur, lens distortion, chromatic aberration, film grain, light leaks, and more. Includes disk blur types and cinematic r","platform":"Unreal Engine","publishedAt":"2026-08-20T09:55:15.932Z","updatedAt":"2026-08-20T09:55:15.932Z","sourceNotes":[],"fileContents":[],"compatibility":["Unreal Engine","Engine Version: 5.1+"],"featuredImage":{"alt":"Lens and Film Post Process","src":"/wp-content/uploads/published/2026/08/9f516287e615-b76a2f41-7419-402c-9096-7d1b7d173679-78137b7b8c.webp"},"hasDownloadLink":true,"downloads":0},{"id":"1000868","slug":"post-process-shader-world-effect","title":"Post Process Shader - World Effect","category":"Shaders","engine":"5.0+","assetVersion":"","engineVersion":"Engine Version: 5.0+","tag":"Shaders","accent":"blue","visual":"mech","summary":"A post-processing shader for Unreal Engine 5 that creates atmospheric and eerie visuals—fog, glow, distortion, color filters—with fully adjustable parameters an","platform":"Unreal Engine","publishedAt":"2026-08-05T06:52:48.407Z","updatedAt":"2026-08-05T06:52:48.407Z","sourceNotes":[],"fileContents":[],"compatibility":["Unreal Engine","Engine Version: 5.0+"],"featuredImage":{"alt":"Post Process Shader - World Effect","src":"/wp-content/uploads/published/2026/08/74d3c34c609f-04e864c3-4d40-4a94-a958-896d7bdc2d3a-f95815c78c.webp"},"hasDownloadLink":true,"downloads":0},{"id":"15922","slug":"post-process-pro-pack","title":"Post Process Pro Pack","category":"Shaders","engine":"5.2+","assetVersion":"Engine version: 5.2+","engineVersion":"4.25","tag":"Shaders","accent":"blue","visual":"animation","summary":"Enhance your project's visuals with the Post Process Pro Pack. This collection features customizable master materials, 34 LUT files, and a bonus stylized water material.","platform":"Unreal Engine","publishedAt":"2026-03-12T13:29:14.000Z","updatedAt":"2026-04-19T15:44:39.000Z","sourceNotes":[],"fileContents":[],"compatibility":["Unreal Engine","Engine version: 5.2+"],"featuredImage":{"alt":"Post Process Pro Pack","src":"https://3dcghub.com/wp-content/uploads/2026/03/5547d228-7286-422e-8e00-494312ae8338.webp"},"hasDownloadLink":true,"downloads":2}]}
Shaders
Post Process Shader - Scan Effect
A UE5 post-process shader that creates glowing scan outlines on object edges and surfaces, with full color, thickness, and glow control. Works in any lighting.
Category:Unreal Engine, ShadersPlatform: Unreal EngineEngine Version: 5.0+Published: Aug 5, 2026
Shaders
Resource overview
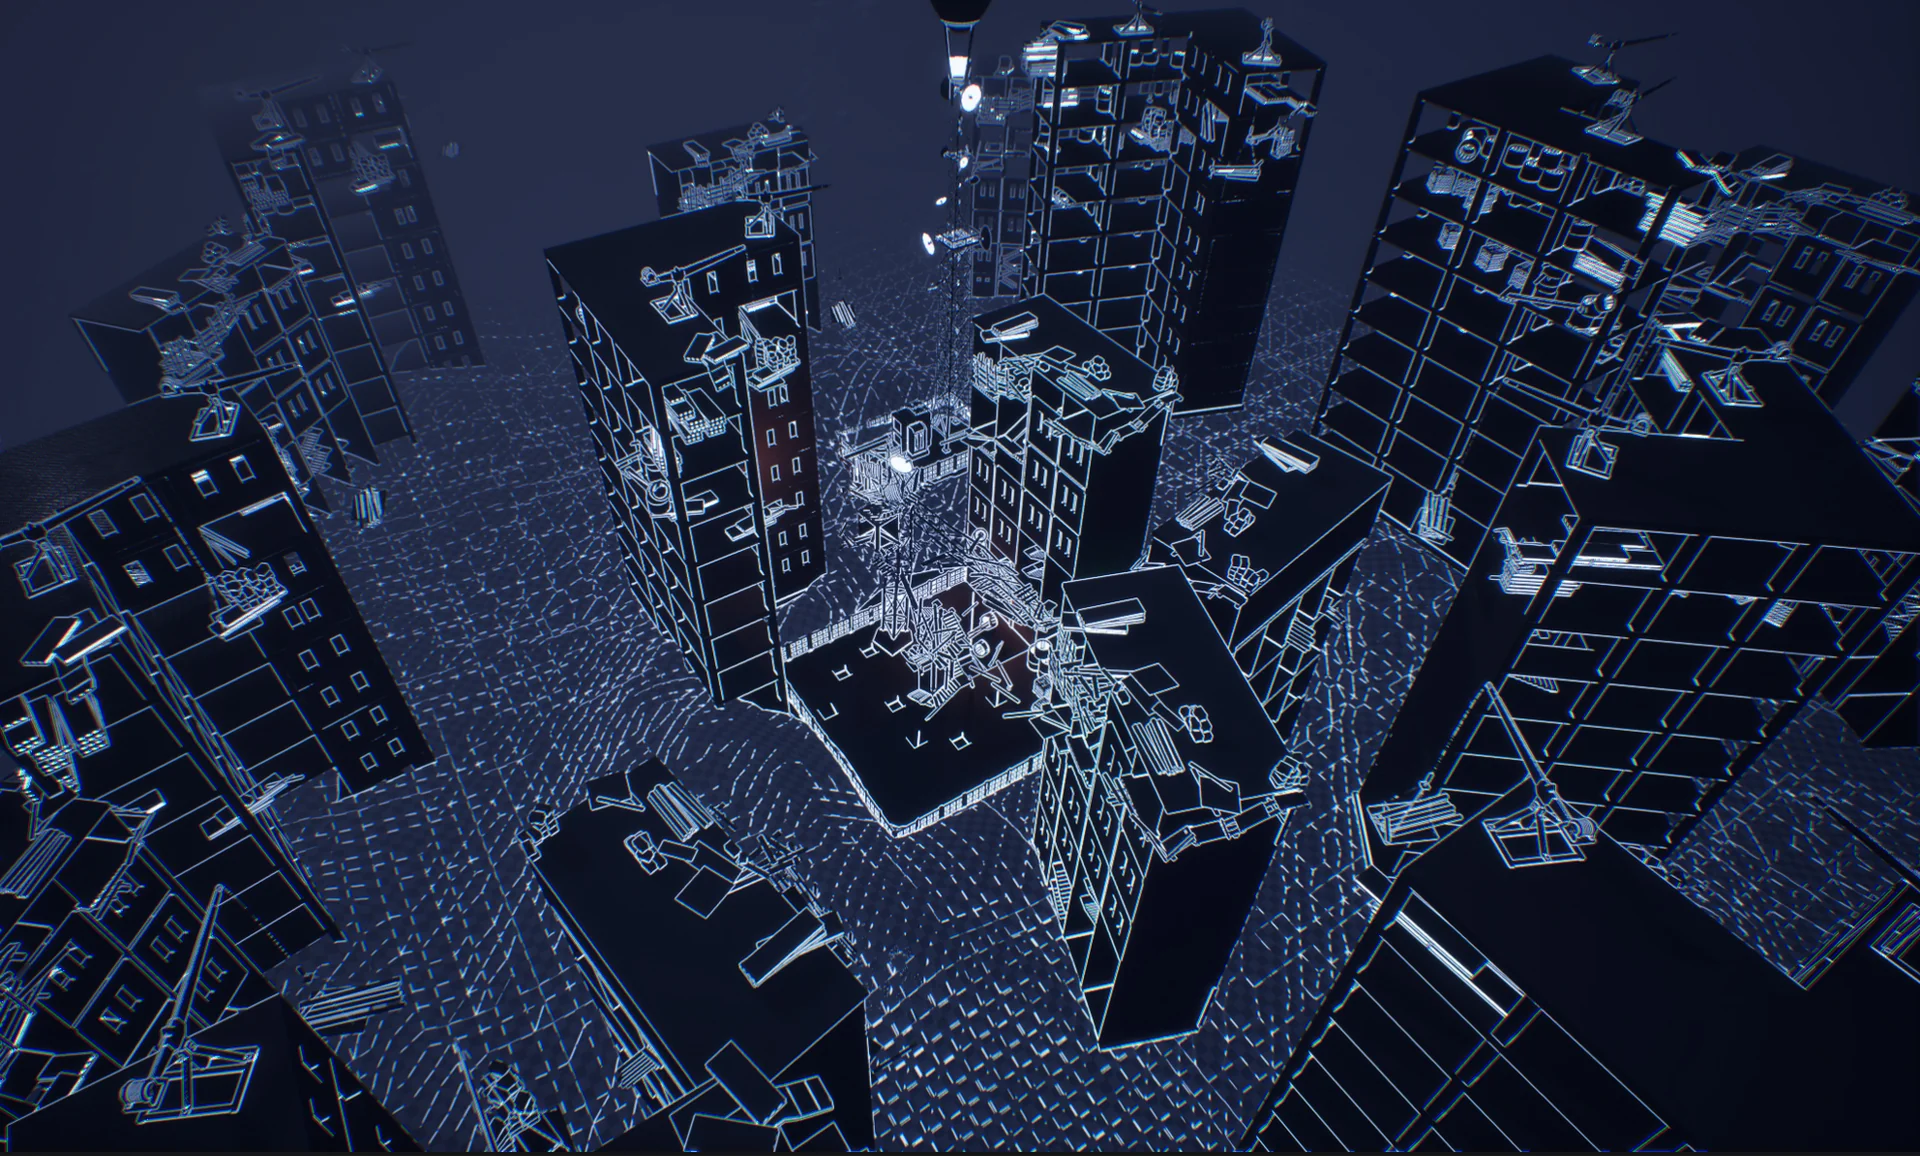
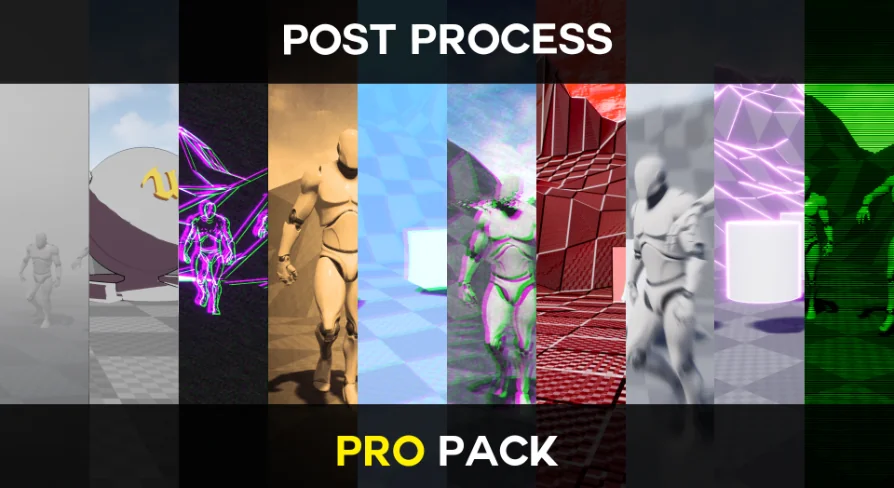
In the middle of a tense sci-fi scene, the moment a device sweeps across a wall and reveals hidden geometry changes the pacing. It is a small visual cue that tells the player exactly what matters. The Post Process Shader - Scan Effect for Unreal Engine 5 (UE5) turns that cue into a glowing outline around objects, making the scan read clearly against any background.
A Post-Process Effect for UE5
This is a Post-Process Shader, which means it works after the main scene is rendered. It scans objects by highlighting their edges and surfaces with a glowing outline. That outline shows the shape of whatever is being examined, so the player immediately sees which object is under inspection.
The shader is built to adapt to lighting conditions. Whether the scene is a sunlit exterior or a shadowed corridor, the effect keeps its consistency. Because it is Post-Process, it doesn't rely on the scene's light sources. That leaves a clean outline that does not vary wildly when the camera moves or when lighting changes mid-Level.
Real-time rendering is a core requirement, and this shader meets it without straining the system. It works during gameplay, so it is suitable for interactive use rather than being limited to baked previews.
Customization: Outline Color, Thickness, and Glow
The scan effect does not lock you into a single look. The developer can adjust the outline color, thickness, glow intensity, and other parameters. These settings give the shader enough range to fit a project's specific art direction. A subtle blue outline works for a calm scanning sequence, while a bright orange sweep can feel urgent and hostile.
Even beginner developers can approach the settings without getting lost. The shader provides control over the key values clearly, and the notes that accompany the effect point out that the route to a good result is simply tweaking values until they match the project and taste. There is no 1 correct setup; the shader invites experimentation.
Triggering the Scan: Q and E
To see the effect in action quickly, the demonstration uses 2 keyboard keys. Q starts the scan animation, and E starts the reverse animation. That simple 2-key setup is useful for testing the effect in a Level, and it can be mapped to actual gameplay events such as approaching an object or pressing an interact button.
The ability to reverse the animation is a nice touch. It allows the scan to sweep forward and then rewind, which fits User Interface (UI) panels or tech devices that need to re-scan the same area.
Where the Scan Effect Slots In
The shader was designed with several use cases in mind. For science fiction projects, it can be added to drones, robots, or high-tech gadgets that need to identify objects in the world. For exploration games, it gives the player a way to analyze objects or environments and receive a visual reward.
Interactive projects benefit from the effect too. When players click or touch an object, the scan provides immediate feedback, confirming that the interaction registered. In cinematic scenes, the scan can be used in Cutscenes or trailers to introduce a piece of technology or build tension before a reveal.
These scenarios are not mutually exclusive. The same shader can appear in a game's UI, a Cutscene, and a core mechanic, keeping the visual language consistent across the project.
Learning from Scratch: Blueprint and Sequencer
A tutorial video walks through building a scanning shader from scratch in UE5. It also shows how to integrate the effect with Blueprint and Sequencer. That means developers do not have to treat the shader as a black box. The tutorial explains the logic behind the effect, so it can be adapted to other Post-Process needs or extended with different behaviors.
For a developer who wants to use the effect in a Cutscene, Sequencer integration is particularly useful. The shader's reverse animation can be timed to match a camera move or a character's line of dialogue. The tutorial covers this workflow, making it easier to place the scan event at the right moment.
Setting Values to Match the Project
The 1 notable instruction in the resource is about parameter adjustment. It notes that the shader allows you to create your own effects by adjusting parameters, and that even beginners can quickly figure out the settings because the key is tweaking values to your taste and style. There is no mandatory preset. That flexibility is what makes the shader useful across very different visual styles.
In the end, the Post Process Shader - Scan Effect is a good fit for a developer who wants a polished scanning effect without spending time on the underlying Post-Process math. The included tutorial and the straightforward controls lower the barrier, while the customization options keep it interesting for more experienced artists.
 Shaders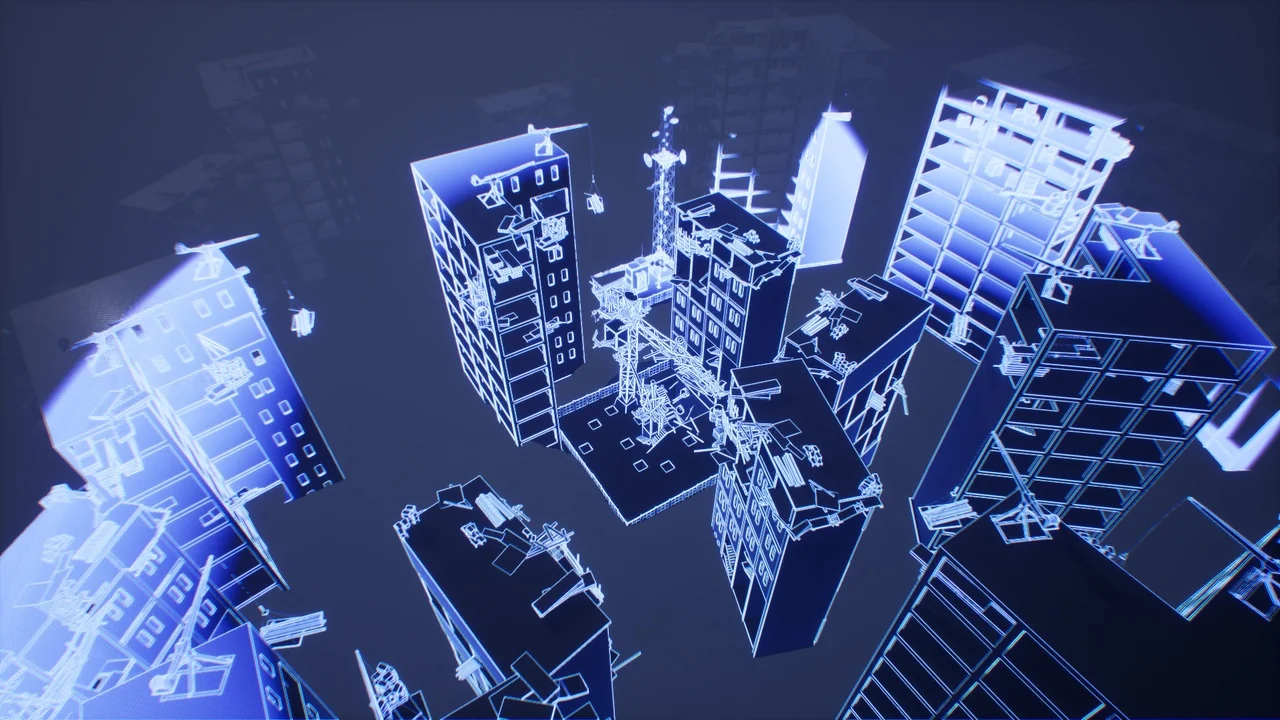
 Shaders
 Shaders
 Shaders