"fc90a3d9bed8d197"{"id":"1000416","slug":"unreal-engine-5-create-professional-cinematics-and-trailers","title":"Unreal Engine 5 - Create Professional Cinematics \u0026 Trailers!","category":"Unreal Engine","engine":"File Content: video + English subtitles","assetVersion":"Video Language: English","engineVersion":"File Content: video + English subtitles","tag":"Unreal Engine","accent":"blue","visual":"mech","summary":"Master the complete UE5 cinematic pipeline, from Quixel Megascan environment assembly and virtual camera rigging to final rendering and Da Vinci Resolve color g","platform":"Unreal Engine","publishedAt":"2026-07-08T18:12:44.848Z","updatedAt":"2026-07-08T18:12:44.848Z","sourceNotes":[],"fileContents":[],"compatibility":["Unreal Engine","Video Language: English","File Content: video + English subtitles"],"featuredImage":{"alt":"Unreal Engine 5 - Create Professional Cinematics \u0026 Trailers!","src":"/wp-content/uploads/published/2026/07/656a068cc195-6052941-4c1e-5-a8fbc27b84.webp"},"hasDownloadLink":true,"downloads":0,"terms":[{"taxonomy":"category","slug":"tutoriallibrary-unrealengine","name":"Unreal Engine"}],"galleryImages":[],"accessPanel":{"kind":"video-resource","title":"Download this video resource","eyebrow":"Free Download","message":"Log in or create a free account to start your download.","fileName":"Unreal Engine 5 - Create Professional Cinematics \u0026 Trailers!.7z","safetyNote":"Resources are manually reviewed before listing to improve quality and reduce obvious risks.","actionLabel":"Download Free","resourceType":"Video download"},"contentHtml":"\u003ch2\u003eBuilding Cinematic Environments from Scratch\u003c/h2\u003e\n\u003cp\u003eDeveloping a professional cinematic or trailer inside Unreal Engine 5 requires a highly structured approach to scene assembly. The production pipeline begins with the absolute fundamentals of the software environment. Before any animation or rendering can occur, artists must understand how to properly install UE5, navigate the engine's complex user interface, and securely download free marketplace assets to build their personal libraries. Once the interface is mastered, the workflow moves directly into level editing, where an empty digital space is populated with environmental elements to form a cohesive set.\u003c/p\u003e\n\u003cp\u003eBy utilizing free assets, the environment design process relies heavily on adding and precisely controlling static meshes to establish the underlying architecture of a scene. To achieve high-fidelity realism, the scene-building phase incorporates Quixel Megascans, allowing digital artists to bring photorealistic, scanned 3D surface materials and objects directly into their levels. This high-resolution geometry is paired with Unreal Engine’s dedicated foliage systems. Utilizing these foliage tools provides the necessary mechanics to scatter vegetation, trees, and ground cover organically across the terrain. Together, the careful arrangement of static meshes, Megascans, and foliage forms the structural foundation of scene creation, setting the stage for advanced camera work and lighting.\u003c/p\u003e\n\u003ch2\u003eVirtual Cinematography and Camera Rigging\u003c/h2\u003e\n\u003cp\u003eOnce the digital environment is constructed, the focus shifts to how the scene is actually captured and framed. Virtual cinematography in Unreal Engine 5 closely mirrors real-world camera techniques, requiring a deep understanding of standard cinematic tools. Rather than simply flying a viewpoint around a level, the workflow introduces specific virtual rigs that allow for precise, repeatable camera movement.\u003c/p\u003e\n\u003cp\u003eThe Camera Rig Rail is utilized to plot exact paths for the virtual camera to travel along, ensuring incredibly smooth tracking shots that can follow characters or vehicles through the environment seamlessly. For sweeping, multi-axis movements that require changes in elevation, the Rig Crane allows operators to lift and sweep the camera across the environment, mimicking the massive jib shots used in Hollywood productions. Beyond the physical movement of the virtual camera, the setup involves dialing in professional camera settings to control vital aspects of the image, such as focal length, depth of field, and exposure. To add a layer of visceral, grounded realism to action sequences or high-impact environmental moments, camera shake effects are layered directly into the sequence, deliberately breaking up the mechanical perfection of a digital tracking shot to simulate handheld operation.\u003c/p\u003e\n\u003ch2\u003eAtmosphere Design with Custom Lighting and VFX\u003c/h2\u003e\n\u003cp\u003eLighting and atmospheric effects are directly responsible for establishing the mood, tone, and visual depth of any cinematic sequence. Rather than relying on pre-built or default environmental lighting setups, the workflow involves creating lighting for scenes entirely from scratch. This requires a detailed explanation and understanding of how different light sources interact with the static meshes and high-resolution Megascans placed earlier in the pipeline. \u003c/p\u003e\n\u003cp\u003eAccompanying the raw lighting setup is the detailed control of the engine's Post Process Volume. This critical system acts as an in-engine grading and effects tool, allowing artists to adjust contrast, bloom, ambient occlusion, exposure, and color balances globally before the final render is ever initiated. To make the scene feel dynamic and lived-in, various environmental effects are integrated into the custom lighting. This is achieved using both standard Particle VFX and the advanced Niagara VFX system. These particle systems introduce moving atmospheric elements—such as falling debris, floating dust, fire, or ambient energy—that interact dynamically with the custom lighting and Post Process Volume, adding immediate visual complexity to the cinematic.\u003c/p\u003e\n\u003ch2\u003eCharacter Animation and Sequence Pacing\u003c/h2\u003e\n\u003cp\u003eWith the set fully dressed, lit, and framed, the scene requires motion and narrative direction to become a true trailer or cutscene. Animating a full sequence involves importing and organizing actors directly within the engine's timeline. The process covers exactly how to add characters to a level and apply specific, pre-assigned animations to them, seamlessly blending their physical movements into the timing of the camera sweeps and crane shots.\u003c/p\u003e\n\u003cp\u003eCreating professional trailers also relies heavily on pacing and narrative flow, which is why the workflow incorporates strict industry-standard rules for cutscenes. This ensures that artists understand the timing of cuts, the management of screen direction, and how to structure seamless visual transitions between different camera angles. To fully sell the animation, sound effects (SFX) are layered directly into the cinematic timeline. By syncing audio cues with character actions, Niagara particle effects, and camera movements, the visual pacing is reinforced by the sound design, creating a cohesive audiovisual experience.\u003c/p\u003e\n\u003ch2\u003eFinal Rendering and Da Vinci Resolve Color Grading\u003c/h2\u003e\n\u003cp\u003eThe final stage of the virtual production pipeline moves from the sequencer timeline to the final video output. Unreal Engine 5 contains a variety of advanced rendering features designed to export high-quality image sequences or video files. Understanding these specific render settings and technical tips is critical for ensuring that the custom lighting, complex Niagara VFX, and professional camera settings translate accurately into the final exported file without artifacting or quality loss.\u003c/p\u003e\n\u003cp\u003eAfter the engine successfully completes the rendering process, the workflow extends outward into dedicated post-production software. An extra bonus chapter details the specific pipeline of taking the rendered Unreal Engine 5 footage and importing it into Da Vinci Resolve. Here, the raw footage undergoes professional color grading, allowing video editors and virtual production artists to apply final stylistic adjustments to the shadows, highlights, and overall color palette, ensuring the completed trailer meets broadcast or film industry standards.\u003c/p\u003e\n\u003ch2\u003eProduction Workflow Fit\u003c/h2\u003e\n\u003cp\u003eThe entire cinematic creation pipeline is structured into a comprehensive 5-hour and 12-minute curriculum provided by 3D College. Published on December 24, 2025, the material is categorized as accessible for all levels of experience. While the foundational modules cover absolute basics like engine installation, marketplace asset downloading, and UI navigation, the core focus targets beginner to intermediate game developers, virtual production artists, video editors, and animators. By moving step-by-step from an empty level through environment design, camera rigging, character animation, custom lighting, and finally into Da Vinci Resolve post-production, the workflow provides a complete, end-to-end blueprint for professional cinematic and trailer production.\u003c/p\u003e\n\n\u003ch2\u003eRelated Resources Worth Checking\u003c/h2\u003e\n\u003cul\u003e\n\u003cli\u003e\u003ca href=\"https://3dcghub.com/unreal-engine-5-5-the-ultimate-cinematic-masterclass/\" title=\"Unreal Engine 5.5 - The Ultimate Cinematic Masterclass\"\u003eUnreal Engine 5.5 - The Ultimate Cinematic Masterclass\u003c/a\u003e\u003c/li\u003e\n\u003cli\u003e\u003ca href=\"https://3dcghub.com/learn-how-to-create-a-survival-horror-in-unreal-engine/\" title=\"Learn How To Create A Survival Horror In Unreal Engine\"\u003eLearn How To Create A Survival Horror In Unreal Engine\u003c/a\u003e\u003c/li\u003e\n\u003cli\u003e\u003ca href=\"https://3dcghub.com/unreal-cinematic-mastery-from-beginner-to-cinematic-creator/\" title=\"Unreal Cinematic Mastery –From Beginner to Cinematic Creator\"\u003eUnreal Cinematic Mastery –From Beginner to Cinematic Creator\u003c/a\u003e\u003c/li\u003e\n\u003cli\u003e\u003ca href=\"https://3dcghub.com/how-to-create-a-weapon-customization-system-in-ue5/\" title=\"How To Create a Weapon Customization System in UE5\"\u003eHow To Create a Weapon Customization System in UE5\u003c/a\u003e\u003c/li\u003e\n\u003cli\u003e\u003ca href=\"https://3dcghub.com/unreal-engine-5-the-complete-automotive-cinematic-course/\" title=\"Unreal Engine 5 - The Complete Automotive Cinematic Course\"\u003eUnreal Engine 5 - The Complete Automotive Cinematic Course\u003c/a\u003e\u003c/li\u003e\n\u003c/ul\u003e","contentTextLength":7421,"navigation":{"current":1215,"total":3491,"previous":{"id":"1000417","slug":"abandoned-service-garage-vol-4-vehicles-and-service-machines","title":"Abandoned Service Garage - VOL.4 - Vehicles and Service Machines","category":"Cars \u0026 Trucks","platform":"Unreal Engine","updatedAt":"2026-07-08T21:45:16.576Z"},"next":{"id":"1000415","slug":"unreal-engine-5-architecture-visualization-interior-design","title":"Unreal Engine 5: Architecture Visualization/Interior Design","category":"Unreal Engine","platform":"Unreal Engine","updatedAt":"2026-07-08T16:15:14.880Z"}},"relatedResources":[{"id":"1001153","slug":"easily-create-captivating-environments-in-unreal-engine","title":"Easily Create Captivating Environments in Unreal Engine","category":"Unreal Engine","engine":"File Content: video + English subtitles","assetVersion":"Video Language: English","engineVersion":"File Content: video + English subtitles","tag":"Unreal Engine","accent":"blue","visual":"city","summary":"Learn to build photorealistic environments in Unreal Engine 4 using Quixel Megascans, structured map layout, foliage placement, and post-processing.","platform":"Unreal Engine","publishedAt":"2026-09-10T23:37:52.970Z","updatedAt":"2026-09-10T23:57:53.448Z","sourceNotes":[],"fileContents":[],"compatibility":["Unreal Engine","Video Language: English","File Content: video + English subtitles"],"featuredImage":{"alt":"Easily Create Captivating Environments in Unreal Engine","src":"/wp-content/uploads/published/2026/09/9c0b1db53d69-708b68fb1c82-w1200-3350e4d46d.webp"},"hasDownloadLink":true,"downloads":1},{"id":"1000910","slug":"unreal-blueprints-create-games-with-visual-scripting-in-unreal-5-6","title":"Unreal Blueprints: Create Games with Visual Scripting in Unreal 5.6","category":"Unreal Engine","engine":"File Content: video + English subtitles","assetVersion":"Video Language: English","engineVersion":"File Content: video + English subtitles","tag":"Unreal Engine","accent":"blue","visual":"mech","summary":"Build three complete games—Marble Run, Crystal Caverns, and Mars Marine—using Unreal 5.6's Blueprint visual scripting. A beginner-friendly course from GameDev.t","platform":"Unreal Engine","publishedAt":"2026-08-06T13:20:33.760Z","updatedAt":"2026-08-06T13:20:33.760Z","sourceNotes":[],"fileContents":[],"compatibility":["Unreal Engine","Video Language: English","File Content: video + English subtitles"],"featuredImage":{"alt":"Unreal Blueprints: Create Games with Visual Scripting in Unreal 5.6","src":"/wp-content/uploads/published/2026/08/8a135189a0df-ragzbmpcjb5j-2f97113de1.webp"},"hasDownloadLink":true,"downloads":3},{"id":"1000744","slug":"how-to-create-a-movie-in-unreal-engine-5-beginners-edition","title":"How to create a movie in Unreal Engine 5 Beginners Edition","category":"Unreal Engine","engine":"File Content: video + English subtitles","assetVersion":"Video Language: English","engineVersion":"File Content: video + English subtitles","tag":"Unreal Engine","accent":"blue","visual":"mech","summary":"A beginner-level UE5 course on creating CG animation, migrating projects, importing motion capture, and working with MetaHumans.","platform":"Unreal Engine","publishedAt":"2026-07-27T12:07:40.122Z","updatedAt":"2026-07-27T12:07:40.122Z","sourceNotes":[],"fileContents":[],"compatibility":["Unreal Engine","Video Language: English","File Content: video + English subtitles"],"featuredImage":{"alt":"How to create a movie in Unreal Engine 5 Beginners Edition","src":"/wp-content/uploads/published/2026/07/a207ba37646d-4192342-4b9b-11-973394dbfe.webp"},"hasDownloadLink":true,"downloads":4}]}
Unreal Engine
Unreal Engine 5 - Create Professional Cinematics & Trailers!
Master the complete UE5 cinematic pipeline, from Quixel Megascan environment assembly and virtual camera rigging to final rendering and Da Vinci Resolve color g
Category:Unreal EnginePlatform: Unreal EngineVideo Language: EnglishFile Content: video + English subtitlesPublished: Jul 8, 2026
Unreal Engine
Resource overview
Building Cinematic Environments from Scratch
Developing a professional cinematic or trailer inside Unreal Engine 5 requires a highly structured approach to scene assembly. The production pipeline begins with the absolute fundamentals of the software environment. Before any animation or rendering can occur, artists must understand how to properly install UE5, navigate the engine's complex user interface, and securely download free marketplace assets to build their personal libraries. Once the interface is mastered, the workflow moves directly into level editing, where an empty digital space is populated with environmental elements to form a cohesive set.
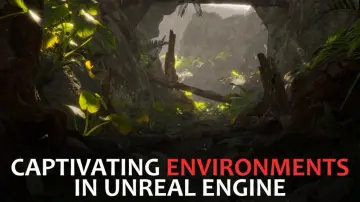
By utilizing free assets, the environment design process relies heavily on adding and precisely controlling static meshes to establish the underlying architecture of a scene. To achieve high-fidelity realism, the scene-building phase incorporates Quixel Megascans, allowing digital artists to bring photorealistic, scanned 3D surface materials and objects directly into their levels. This high-resolution geometry is paired with Unreal Engine’s dedicated foliage systems. Utilizing these foliage tools provides the necessary mechanics to scatter vegetation, trees, and ground cover organically across the terrain. Together, the careful arrangement of static meshes, Megascans, and foliage forms the structural foundation of scene creation, setting the stage for advanced camera work and lighting.
Virtual Cinematography and Camera Rigging
Once the digital environment is constructed, the focus shifts to how the scene is actually captured and framed. Virtual cinematography in Unreal Engine 5 closely mirrors real-world camera techniques, requiring a deep understanding of standard cinematic tools. Rather than simply flying a viewpoint around a level, the workflow introduces specific virtual rigs that allow for precise, repeatable camera movement.
The Camera Rig Rail is utilized to plot exact paths for the virtual camera to travel along, ensuring incredibly smooth tracking shots that can follow characters or vehicles through the environment seamlessly. For sweeping, multi-axis movements that require changes in elevation, the Rig Crane allows operators to lift and sweep the camera across the environment, mimicking the massive jib shots used in Hollywood productions. Beyond the physical movement of the virtual camera, the setup involves dialing in professional camera settings to control vital aspects of the image, such as focal length, depth of field, and exposure. To add a layer of visceral, grounded realism to action sequences or high-impact environmental moments, camera shake effects are layered directly into the sequence, deliberately breaking up the mechanical perfection of a digital tracking shot to simulate handheld operation.
Atmosphere Design with Custom Lighting and VFX
Lighting and atmospheric effects are directly responsible for establishing the mood, tone, and visual depth of any cinematic sequence. Rather than relying on pre-built or default environmental lighting setups, the workflow involves creating lighting for scenes entirely from scratch. This requires a detailed explanation and understanding of how different light sources interact with the static meshes and high-resolution Megascans placed earlier in the pipeline.
Accompanying the raw lighting setup is the detailed control of the engine's Post Process Volume. This critical system acts as an in-engine grading and effects tool, allowing artists to adjust contrast, bloom, ambient occlusion, exposure, and color balances globally before the final render is ever initiated. To make the scene feel dynamic and lived-in, various environmental effects are integrated into the custom lighting. This is achieved using both standard Particle VFX and the advanced Niagara VFX system. These particle systems introduce moving atmospheric elements—such as falling debris, floating dust, fire, or ambient energy—that interact dynamically with the custom lighting and Post Process Volume, adding immediate visual complexity to the cinematic.
Character Animation and Sequence Pacing
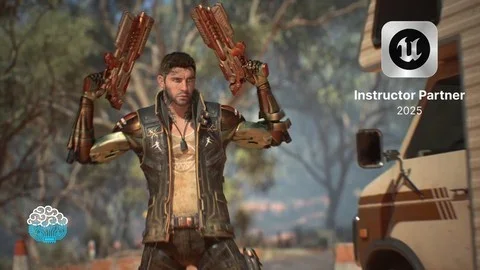
With the set fully dressed, lit, and framed, the scene requires motion and narrative direction to become a true trailer or cutscene. Animating a full sequence involves importing and organizing actors directly within the engine's timeline. The process covers exactly how to add characters to a level and apply specific, pre-assigned animations to them, seamlessly blending their physical movements into the timing of the camera sweeps and crane shots.
Creating professional trailers also relies heavily on pacing and narrative flow, which is why the workflow incorporates strict industry-standard rules for cutscenes. This ensures that artists understand the timing of cuts, the management of screen direction, and how to structure seamless visual transitions between different camera angles. To fully sell the animation, sound effects (SFX) are layered directly into the cinematic timeline. By syncing audio cues with character actions, Niagara particle effects, and camera movements, the visual pacing is reinforced by the sound design, creating a cohesive audiovisual experience.
Final Rendering and Da Vinci Resolve Color Grading
The final stage of the virtual production pipeline moves from the sequencer timeline to the final video output. Unreal Engine 5 contains a variety of advanced rendering features designed to export high-quality image sequences or video files. Understanding these specific render settings and technical tips is critical for ensuring that the custom lighting, complex Niagara VFX, and professional camera settings translate accurately into the final exported file without artifacting or quality loss.
After the engine successfully completes the rendering process, the workflow extends outward into dedicated post-production software. An extra bonus chapter details the specific pipeline of taking the rendered Unreal Engine 5 footage and importing it into Da Vinci Resolve. Here, the raw footage undergoes professional color grading, allowing video editors and virtual production artists to apply final stylistic adjustments to the shadows, highlights, and overall color palette, ensuring the completed trailer meets broadcast or film industry standards.
Production Workflow Fit
The entire cinematic creation pipeline is structured into a comprehensive 5-hour and 12-minute curriculum provided by 3D College. Published on December 24, 2025, the material is categorized as accessible for all levels of experience. While the foundational modules cover absolute basics like engine installation, marketplace asset downloading, and UI navigation, the core focus targets beginner to intermediate game developers, virtual production artists, video editors, and animators. By moving step-by-step from an empty level through environment design, camera rigging, character animation, custom lighting, and finally into Da Vinci Resolve post-production, the workflow provides a complete, end-to-end blueprint for professional cinematic and trailer production.
 Unreal Engine
 Unreal Engine
 Unreal Engine
 Unreal Engine