"f813c18d2170b1f6"{"id":"24614","slug":"animated-render-border","title":"Animated Render Border","category":"Blender Add-ons \u0026 Plugins","engine":"3.0.7","assetVersion":"","engineVersion":"Asset Version:3.0.7","tag":"Blender Add","accent":"amber","visual":"mech","summary":"Animated Render Border keeps Blenderâs render region moving with the subject, so the frame stays centered on selected objects or collections during animation. It also includes manual keyframing, margin control, and two tracking modes for different levels...","platform":"Blender","publishedAt":"2026-04-15T14:56:56.000Z","updatedAt":"2026-04-20T06:12:41.000Z","sourceNotes":[],"fileContents":[],"compatibility":["Blender","Asset Version: 3.0.7"],"featuredImage":{"alt":"Animated Render Border","src":"https://3dcghub.com/wp-content/uploads/2026/04/bf6d42b81598_xlarge-66de896c1d0d99e18245c16ff5fcd30c.webp"},"hasDownloadLink":true,"downloads":0,"terms":[{"taxonomy":"category","slug":"blender-add-ons-plugins","name":"Blender Add-ons \u0026 Plugins"},{"taxonomy":"post_tag","slug":"animation","name":"Animation"},{"taxonomy":"post_tag","slug":"blender","name":"Blender"},{"taxonomy":"post_tag","slug":"tools","name":"Tools"}],"galleryImages":[{"src":"https://3dcghub.com/wp-content/uploads/2026/04/35a2cde9e9c1_xlarge-e2e65020772403c66922ca2a7b1773e3.webp","alt":"Animated Render Border"},{"src":"https://3dcghub.com/wp-content/uploads/2026/04/6f1aa68d161e_xlarge-3ca409112f380bf570e2cb537ae7ec6f.webp","alt":"Animated Render Border"},{"src":"https://3dcghub.com/wp-content/uploads/2026/04/e880ec91ac1a_xlarge-2be0ce9373677219051abbf98727e6c4.webp","alt":"Animated Render Border"},{"src":"https://3dcghub.com/wp-content/uploads/2026/04/35e059fc01d8_xlarge-5229a1f55f120fb96a8888fc194935e2.webp","alt":"Animated Render Border"},{"src":"https://3dcghub.com/wp-content/uploads/2026/04/37bb88553d85_xlarge-8bf98a53e20259ea21adc7ff8eb9a2d7.webp","alt":"Animated Render Border"}],"accessPanel":{"kind":"resource","title":"Access this resource","eyebrow":"Free Download","message":"Log in or create a free account to start your download.","fileName":"Animated Render Border v3.0.7.7z","safetyNote":"All resources are 100% manually reviewed to eliminate all risks.","actionLabel":"Download Free","resourceType":"Resource archive"},"contentHtml":"\u003ch2\u003eKeeping the render region on a moving subject\u003c/h2\u003e\n\u003cp\u003eBlenderâs region rendering lets you draw a box around the part of the camera view you want to render and ignore the rest. That works cleanly for still frames, but animated subjects move away from a fixed border very quickly. Animated Render Border turns that static box into an adaptive render region that updates every frame so it continues to surround the selected object or collection.\u003c/p\u003e\n\u003cp\u003eThe practical value is straightforward: when an animated subject travels across the frame, the render area follows it instead of leaving the subject partly outside the border. That keeps the render focused on the part of the image you actually want to evaluate, rather than spending time on surrounding areas that do not need attention.\u003c/p\u003e \u003ch2\u003eTracking objects, collections, and different object types\u003c/h2\u003e\n\u003cp\u003eThe add-on tracks either a single object or a collection of objects and uses that selection to drive the render region. It can track meshes, text, curves, lattices, armatures, bones, surfaces, and meta objects. Geometry generated by modifiers can also be tracked in bounding box mode.\u003c/p\u003e\n\u003cp\u003eTwo tracking modes are available. One uses precise tracking, while the other uses a faster bounding box tracking mode that is less exact. That gives a choice between tighter framing and a lighter approach when exact tracking is not necessary. The render region can also be given an adjustable margin property, which adds padding around the tracked object or objects so the border is not pressed tightly against them.\u003c/p\u003e \u003ch3\u003eWhat the tracking is doing frame by frame\u003c/h3\u003e\n\u003cp\u003eThe add-on reads the bounding box of the selected object or objects and adjusts the render region to match. In practice, that means the border is not something you set once and forget; it is recalculated as the subject changes position and size during the animation. Because the region updates every frame, you can scrub through the timeline and see the border move along with the tracked selection.\u003c/p\u003e\n\u003cp\u003eThat frame-by-frame behavior is what makes the tool useful for motion. Instead of keeping the camera view fixed on a border that may no longer fit later in the shot, the region stays aligned with the area that matters at each moment.\u003c/p\u003e \u003ch2\u003eUsing keyframes instead of tracking\u003c/h2\u003e\n\u003cp\u003eAnimated Render Border is not limited to automatic tracking. It also includes a Keyframe mode that lets you place and keyframe the render region manually. In that mode, the border does not follow an object or collection; it follows the position and shape you set by hand over time.\u003c/p\u003e\n\u003cp\u003eThis gives a second way to work when object tracking is not the right fit. If you want precise control over where the render region sits in the frame, manual keyframing lets you animate the border itself. That can be useful when the region needs to move according to a planned layout rather than the motion of a tracked subject.\u003c/p\u003e \u003ch3\u003eManual placement for precise animation\u003c/h3\u003e\n\u003cp\u003eKeyframing the render region is useful when the framing needs to be exact. You can set the position of the region directly and animate it as needed, rather than relying on object movement to define the border. For shots where the region must follow a specific path or stay aligned to a particular part of the image, that kind of control is a practical alternative to tracking.\u003c/p\u003e\n\u003cp\u003eThe add-on keeps both approaches available inside the same workflow: automatic tracking when you want the border to respond to the subject, and manual keyframing when the border itself needs to be animated with more direct control.\u003c/p\u003e \u003ch2\u003eWhere the border helps in real production work\u003c/h2\u003e\n\u003cp\u003eThe most obvious use is test rendering. When an animated object needs to be previewed, the render region can stay focused on that object instead of giving processing time to background areas that are not being examined yet. That makes it easier to check motion and framing without rendering the entire image area every time.\u003c/p\u003e\n\u003cp\u003eIt is also useful for transparent backgrounds, which are common in compositing. Even transparent areas still take time to process, so the ability to track an object or collection and keep the render region on the active part of the frame helps skip empty space that would otherwise be included in the render.\u003c/p\u003e\n\u003cp\u003eBecause the region updates automatically, it fits into a workflow where the animation is still changing and the render needs to follow that motion. You can scroll the timeline to watch the border reposition itself and then render once the framing is where it should be. That makes the add-on a useful layer for animation previews, focused renders, and shots where the important content only occupies a portion of the frame at any given moment.\u003c/p\u003e \u003ch2\u003eChoosing between precision and speed\u003c/h2\u003e\n\u003cp\u003eThe difference between precise tracking and bounding box tracking gives the tool some flexibility. Precise tracking is the better match when the render region needs to hug the selected subject more closely. Bounding box tracking is the faster option and can be especially practical for geometry generated by modifiers, which can be tracked in that mode.\u003c/p\u003e\n\u003cp\u003eThat choice matters when the scene includes different object types or when the goal is to keep setup simple. A broad selection of Blender data types is supported, so the same general workflow can be applied to meshes, text, curves, lattices, armatures, bones, surfaces, and meta objects. The margin control can then be used to open up a little space around the tracked area when a tighter border would be too restrictive.\u003c/p\u003e\n\u003cp\u003eIn production, the add-on fits best wherever an animated subject needs a moving render boundary rather than a fixed one. It keeps the render region tied to the parts of the frame that are actively changing, which makes it easier to preview motion, isolate a subject, or stay focused on the portion of an image that matters most during animation work.\u003c/p\u003e\n\n\u003ch2\u003eMore From The Same Workflow\u003c/h2\u003e\n\u003cul\u003e\n\u003cli\u003e\u003ca href=\"https://3dcghub.com/geppetto-ai-powered-lip-sync-animation/\" title=\"Geppetto – AI-Powered Lip Sync Animation\"\u003eGeppetto – AI-Powered Lip Sync Animation\u003c/a\u003e\u003c/li\u003e\n\u003cli\u003e\u003ca href=\"https://3dcghub.com/tropical-forest-pack/\" title=\"Tropical Forest Pack\"\u003eTropical Forest Pack\u003c/a\u003e\u003c/li\u003e\n\u003cli\u003e\u003ca href=\"https://3dcghub.com/beach-bundle-boys-and-girls/\" title=\"Beach Bundle: Boys and Girls\"\u003eBeach Bundle: Boys and Girls\u003c/a\u003e\u003c/li\u003e\n\u003cli\u003e\u003ca href=\"https://3dcghub.com/elf-arden-stylized-medieval-elven-warrior-animated-rpg-character-hero-56/\" title=\"Elf Arden – Stylized Medieval Elven Warrior – Animated RPG Character Hero – #56\"\u003eElf Arden – Stylized Medieval Elven Warrior – Animated RPG Character Hero – #56\u003c/a\u003e\u003c/li\u003e\n\u003cli\u003e\u003ca href=\"https://3dcghub.com/sand-vfx/\" title=\"Sand VFX\"\u003eSand VFX\u003c/a\u003e\u003c/li\u003e\n\u003c/ul\u003e\n\n\u003ch2\u003eAsset Gallery\u003c/h2\u003e","contentTextLength":6034,"navigation":{"current":1967,"total":3651,"previous":{"id":"24627","slug":"auto-upscale-addon","title":"Auto Upscale Addon","category":"Blender Add-ons \u0026 Plugins","platform":"Blender","updatedAt":"2026-04-20T06:12:41.000Z"},"next":{"id":"24604","slug":"create-a-complete-2d-survivors-style-game-in-godot-4","title":"Create a Complete 2D Survivors Style Game in Godot 4","category":"Godot","platform":"Unreal Engine","updatedAt":"2026-04-20T06:12:41.000Z"}},"relatedResources":[{"id":"24632","slug":"auto-rig-pro-quick-rig","title":"Auto-Rig Pro: Quick Rig","category":"Blender Add-ons \u0026 Plugins","engine":"3.76.17","assetVersion":"","engineVersion":"Asset Version:3.76.17","tag":"Blender Add","accent":"amber","visual":"mech","summary":"Quick Rig moves an existing skeleton and mesh into an Auto-Rig Pro control setup without rebuilding the whole character from scratch. It supports Preserve and Convert workflows, mapping presets, and broad limb coverage.","platform":"Blender","publishedAt":"2026-04-15T15:14:33.000Z","updatedAt":"2026-04-20T06:12:40.000Z","sourceNotes":[],"fileContents":[],"compatibility":["Blender","Asset Version: 3.76.17"],"featuredImage":{"alt":"Auto-Rig Pro: Quick Rig","src":"https://3dcghub.com/wp-content/uploads/2026/04/71461bf1b529_6cd57bacdf890691c81904aa7fe63256.webp"},"hasDownloadLink":true,"downloads":6},{"id":"24677","slug":"rbc-a-physics-based-vehicle-rigging-addon","title":"Rbc | A Physics-Based Vehicle Rigging Addon","category":"Blender Add-ons \u0026 Plugins","engine":"1.4.8","assetVersion":"","engineVersion":"Asset Version:1.4.8","tag":"Blender Add","accent":"amber","visual":"character","summary":"Rbc gives Blender users a faster way to set up physics-based vehicle rigs without starting from scratch. It focuses on realistic behavior, quick setup, and enough customization to tune the rig until it responds the way a scene needs.","platform":"Blender","publishedAt":"2026-04-16T12:35:28.000Z","updatedAt":"2026-04-20T06:12:39.000Z","sourceNotes":[],"fileContents":[],"compatibility":["Blender","Asset Version: 1.4.8"],"featuredImage":{"alt":"Rbc | A Physics-Based Vehicle Rigging Addon","src":"https://3dcghub.com/wp-content/uploads/2026/04/6b83a05edc2b_xlarge-55653f94cf7d419b079f34ad6a7d2f25.webp"},"hasDownloadLink":true,"downloads":1},{"id":"24627","slug":"auto-upscale-addon","title":"Auto Upscale Addon","category":"Blender Add-ons \u0026 Plugins","engine":"3.0.7","assetVersion":"","engineVersion":"Asset Version:3.0.7","tag":"Blender Add","accent":"amber","visual":"audio","summary":"Auto Upscale Add-on for Blender gives rendered images a higher-resolution finish without adding friction to the workflow. It supports automatic and manual control, scale factors from 2x to 8x, and a choice between speed and quality priorities.","platform":"Blender","publishedAt":"2026-04-15T15:13:26.000Z","updatedAt":"2026-04-20T06:12:41.000Z","sourceNotes":[],"fileContents":[],"compatibility":["Blender","Asset Version: 3.0.7"],"featuredImage":{"alt":"Auto Upscale Addon","src":"https://3dcghub.com/wp-content/uploads/2026/04/f9189afbb669_0a812f61763544e6f8be11d3259f9b21.webp"},"hasDownloadLink":true,"downloads":0}]}
Blender Add
Animated Render Border
Animated Render Border keeps Blenderâs render region moving with the subject, so the frame stays centered on selected objects or collections during animation. It also includes manual keyframing, margin control, and two tracking modes for different levels...
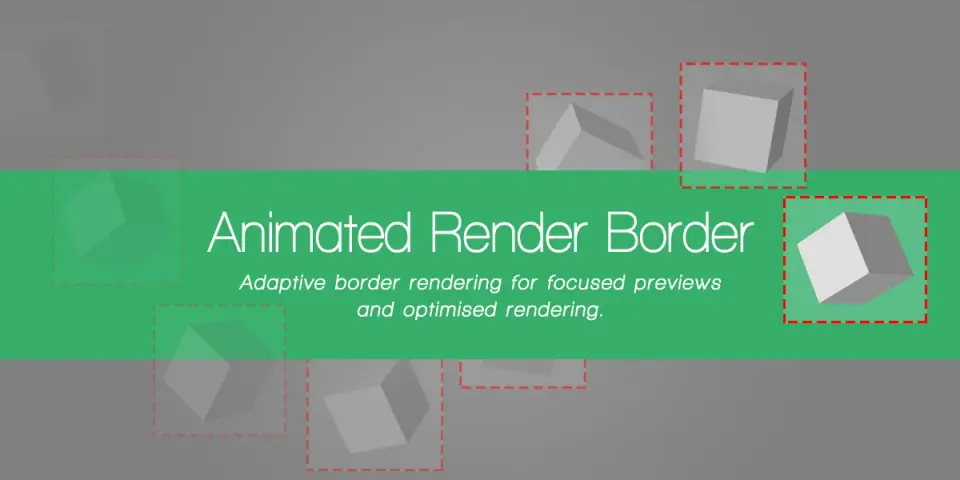
Blenderâs region rendering lets you draw a box around the part of the camera view you want to render and ignore the rest. That works cleanly for still frames, but animated subjects move away from a fixed border very quickly. Animated Render Border turns that static box into an adaptive render region that updates every frame so it continues to surround the selected object or collection.
The practical value is straightforward: when an animated subject travels across the frame, the render area follows it instead of leaving the subject partly outside the border. That keeps the render focused on the part of the image you actually want to evaluate, rather than spending time on surrounding areas that do not need attention.
Tracking objects, collections, and different object types
The add-on tracks either a single object or a collection of objects and uses that selection to drive the render region. It can track meshes, text, curves, lattices, armatures, bones, surfaces, and meta objects. Geometry generated by modifiers can also be tracked in bounding box mode.
Two tracking modes are available. One uses precise tracking, while the other uses a faster bounding box tracking mode that is less exact. That gives a choice between tighter framing and a lighter approach when exact tracking is not necessary. The render region can also be given an adjustable margin property, which adds padding around the tracked object or objects so the border is not pressed tightly against them.
What the tracking is doing frame by frame
The add-on reads the bounding box of the selected object or objects and adjusts the render region to match. In practice, that means the border is not something you set once and forget; it is recalculated as the subject changes position and size during the animation. Because the region updates every frame, you can scrub through the timeline and see the border move along with the tracked selection.
That frame-by-frame behavior is what makes the tool useful for motion. Instead of keeping the camera view fixed on a border that may no longer fit later in the shot, the region stays aligned with the area that matters at each moment.
Using keyframes instead of tracking
Animated Render Border is not limited to automatic tracking. It also includes a Keyframe mode that lets you place and keyframe the render region manually. In that mode, the border does not follow an object or collection; it follows the position and shape you set by hand over time.
This gives a second way to work when object tracking is not the right fit. If you want precise control over where the render region sits in the frame, manual keyframing lets you animate the border itself. That can be useful when the region needs to move according to a planned layout rather than the motion of a tracked subject.
Manual placement for precise animation
Keyframing the render region is useful when the framing needs to be exact. You can set the position of the region directly and animate it as needed, rather than relying on object movement to define the border. For shots where the region must follow a specific path or stay aligned to a particular part of the image, that kind of control is a practical alternative to tracking.
The add-on keeps both approaches available inside the same workflow: automatic tracking when you want the border to respond to the subject, and manual keyframing when the border itself needs to be animated with more direct control.
Where the border helps in real production work
The most obvious use is test rendering. When an animated object needs to be previewed, the render region can stay focused on that object instead of giving processing time to background areas that are not being examined yet. That makes it easier to check motion and framing without rendering the entire image area every time.
It is also useful for transparent backgrounds, which are common in compositing. Even transparent areas still take time to process, so the ability to track an object or collection and keep the render region on the active part of the frame helps skip empty space that would otherwise be included in the render.
Because the region updates automatically, it fits into a workflow where the animation is still changing and the render needs to follow that motion. You can scroll the timeline to watch the border reposition itself and then render once the framing is where it should be. That makes the add-on a useful layer for animation previews, focused renders, and shots where the important content only occupies a portion of the frame at any given moment.
Choosing between precision and speed
The difference between precise tracking and bounding box tracking gives the tool some flexibility. Precise tracking is the better match when the render region needs to hug the selected subject more closely. Bounding box tracking is the faster option and can be especially practical for geometry generated by modifiers, which can be tracked in that mode.
That choice matters when the scene includes different object types or when the goal is to keep setup simple. A broad selection of Blender data types is supported, so the same general workflow can be applied to meshes, text, curves, lattices, armatures, bones, surfaces, and meta objects. The margin control can then be used to open up a little space around the tracked area when a tighter border would be too restrictive.
In production, the add-on fits best wherever an animated subject needs a moving render boundary rather than a fixed one. It keeps the render region tied to the parts of the frame that are actively changing, which makes it easier to preview motion, isolate a subject, or stay focused on the portion of an image that matters most during animation work.
 Blender Add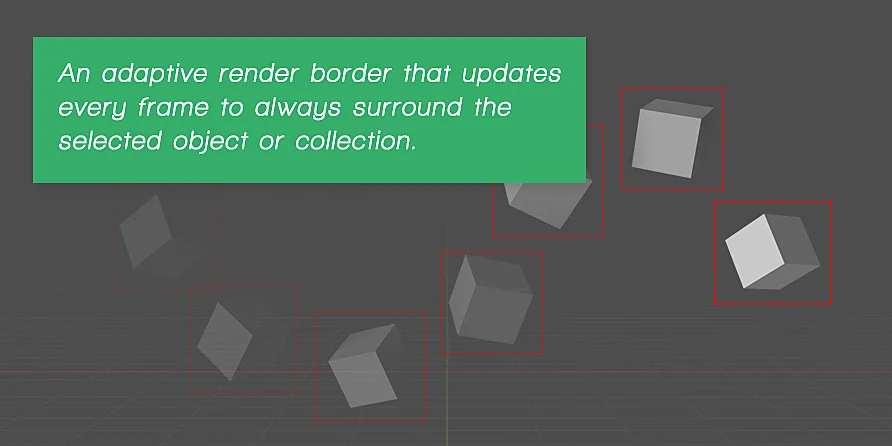
 Blender Add
 Blender Add
 Blender Add