"322fe79650c29655"{"id":"16927","slug":"niagara-morphing-examples","title":"Niagara Morphing Examples","category":"Transition","engine":"5.0+","assetVersion":"Engine version: 5.0+","engineVersion":"4.26","tag":"Transition","accent":"violet","visual":"mech","summary":"Explore high-quality Niagara Morphing Examples designed for seamless visual transitions. This guide covers the essential setup requirements for using Niagara Systems and the BP_Morpher blueprint effectively.","platform":"Unreal Engine","publishedAt":"2026-03-12T18:16:16.000Z","updatedAt":"2026-04-19T15:43:40.000Z","sourceNotes":[],"fileContents":[],"compatibility":["Unreal Engine","Engine version: 5.0+"],"featuredImage":{"alt":"Niagara Morphing Examples","src":"https://3dcghub.com/wp-content/uploads/2026/03/e26b9324-790e-4c1b-8ce3-aac07cd48360.webp"},"hasDownloadLink":true,"pageviews":4,"galleryImages":[{"src":"https://3dcghub.com/wp-content/uploads/2026/03/54fe467c4f40_af84affc-dd29-4623-9d2c-0cacb631919b.webp","alt":"Niagara Morphing Examples"},{"src":"https://3dcghub.com/wp-content/uploads/2026/03/ac7e9d48c3d9_ffb5aa88-f23b-4ac2-b8fb-81351014c992.webp","alt":"Niagara Morphing Examples"},{"src":"https://3dcghub.com/wp-content/uploads/2026/03/085ce61d122b_d25f3d2b-8973-4b44-b3bf-d2f5be3de0d7.webp","alt":"Niagara Morphing Examples"},{"src":"https://3dcghub.com/wp-content/uploads/2026/03/f6061a1caaa8_8b0464cd-4f3c-4858-9a43-e1ae3ea28bec.webp","alt":"Niagara Morphing Examples"},{"src":"https://3dcghub.com/wp-content/uploads/2026/03/7d3d1a4ff005_ab3a1102-6349-4336-b5e2-8acd87862d2f.webp","alt":"Niagara Morphing Examples"},{"src":"https://3dcghub.com/wp-content/uploads/2026/03/1f3a0aa08a09_00db2fd1-8794-4e7f-819f-9cf70d37a9b5.webp","alt":"Niagara Morphing Examples"},{"src":"https://3dcghub.com/wp-content/uploads/2026/03/50151c5e7d4f_fad1ef70-7b28-45f9-bd84-75605f215eee.webp","alt":"Niagara Morphing Examples"}],"accessPanel":{"kind":"resource","title":"Access this resource","eyebrow":"Free protected download","message":"Sign in or create an account to continue to the protected download through the managed storage service.","fileName":"Niagara Morphing Examples.7z","safetyNote":"All resources are 100% manually reviewed to eliminate all risks.","actionLabel":"Download Free","resourceType":"Resource archive","sourceShortcode":"cryptomus_member"},"contentHtml":"\u003ch2\u003eIntroduction to Niagara Morphing Examples\u003c/h2\u003e\n\u003cp\u003eNiagara Morphing Examples offer a specialized look into creating dynamic transitions using Niagara Systems. These examples provide a framework for developers to understand how particles and meshes interact during a morphing sequence. By utilizing the power of the Niagara framework, you can achieve complex visual effects that bridge the gap between different skeletal mesh states. These Niagara Morphing Examples are designed to be integrated into various projects requiring high-quality visual transitions.\u003c/p\u003e\n\n\u003ch2\u003eEssential Setup Requirements\u003c/h2\u003e\n\u003cp\u003eTo successfully implement these Niagara Morphing Examples, several technical prerequisites must be met. First, you must ensure that morphing functionality is added directly to your materials. You can reference the materials included in the examples to understand the specific logic required for the transition to work. Moreover, the creator recommends that Skeletal Meshes (SK) do not contain an excessive number of materials. Minimizing material slots can impact performance and simplify the overall setup.\u003c/p\u003e\n\n\u003cp\u003eBefore testing the effects, it is vital that all shaders are fully compiled. Additionally, the scale of the objects involved in the morphing process should not differ significantly from one another. Keeping scales consistent ensures a smoother visual transition between the source and target meshes. Therefore, careful preparation of your assets is key to achieving the best results with these Niagara Morphing Examples.\u003c/p\u003e\n\n\u003ch2\u003eWorking with BP_Morpher\u003c/h2\u003e\n\u003cp\u003eThe core logic of these examples often relies on a specific blueprint known as BP_Morpher. This tool allows for precise control over the morphing behavior. However, you must ensure that all settings within BP_Morpher are changed to the required values for your specific project needs. Adjusting these parameters is necessary to align the Niagara System with your custom Skeletal Meshes. Consequently, the blueprint serves as the central hub for managing how the morphing effect executes.\u003c/p\u003e\n\n\u003ch2\u003eOptimizing Your Visual Effects\u003c/h2\u003e\n\u003cp\u003eWhen working with these Niagara Morphing Examples, performance and visual clarity are paramount. Following the developer's guidelines regarding material count and shader compilation will prevent common technical issues. Furthermore, the creator provides video tutorials to assist users in navigating the project setup and mastering the morphing techniques. These resources help clarify how the Niagara Systems interact with the materials and blueprints provided in the package. By studying the demonstrations, you can better understand the potential of these visual effects.\u003c/p\u003e\n\n\u003ch2\u003eFinal Take\u003c/h2\u003e\n\u003cp\u003eNiagara Morphing Examples serve as an excellent resource for anyone looking to enhance their visual effects library. By adhering to the setup requirements for materials, scales, and the BP_Morpher blueprint, you can create professional-grade morphing transitions. These examples highlight the versatility of Niagara Systems in modern game development workflows and provide a solid foundation for advanced VFX work.\u003c/p\u003e\n\n\u003ch2\u003eContinue Browsing Similar Packs\u003c/h2\u003e\n\u003cul\u003e\n\u003cli\u003e\u003ca href=\"https://3dcghub.com/niagara-metamorphoses/\" title=\"Niagara Metamorphoses\"\u003eNiagara Metamorphoses\u003c/a\u003e\u003c/li\u003e\n\u003cli\u003e\u003ca href=\"https://3dcghub.com/water-magic-niagara/\" title=\"Water Magic Niagara\"\u003eWater Magic Niagara\u003c/a\u003e\u003c/li\u003e\n\u003cli\u003e\u003ca href=\"https://3dcghub.com/realistic-blood-vfx-niagara-blood-effects-blood-vfx-blood-blood-vfx/\" title=\"Realistic Blood VFX (Niagara Blood Effects, Blood VFX, Blood, Blood VFX)\"\u003eRealistic Blood VFX (Niagara Blood Effects, Blood VFX, Blood, Blood VFX)\u003c/a\u003e\u003c/li\u003e\n\u003cli\u003e\u003ca href=\"https://3dcghub.com/niagara-toon-projectiles/\" title=\"Niagara Toon Projectiles\"\u003eNiagara Toon Projectiles\u003c/a\u003e\u003c/li\u003e\n\u003cli\u003e\u003ca href=\"https://3dcghub.com/niagara-sword-and-shield/\" title=\"Niagara Sword And Shield\"\u003eNiagara Sword And Shield\u003c/a\u003e\u003c/li\u003e\n\u003c/ul\u003e","contentTextLength":3283,"navigation":{"current":2243,"total":2724,"previous":{"id":"16945","slug":"niagaraportalvfx","title":"NiagaraPortalVFX","category":"Transition","platform":"Unreal Engine","updatedAt":"2026-04-19T15:43:40.000Z"},"next":{"id":"16917","slug":"niagara-metamorphoses","title":"Niagara Metamorphoses","category":"Transition","platform":"Unreal Engine","updatedAt":"2026-04-19T15:43:40.000Z"}},"relatedResources":[{"id":"16432","slug":"magic-kit-01","title":"Magic Kit 01","category":"Spells \u0026 Combat","engine":"4.26+,5.0+","assetVersion":"Engine version: 4.26+,5.0+","engineVersion":"4.26","tag":"Spells \u0026 Combat","accent":"amber","visual":"character","summary":"Magic Kit 01 is a specialized VFX pack featuring four elements with unique attack and defense abilities. Built with the Niagara System, it includes example Blueprints for easy integration.","platform":"Unreal Engine","publishedAt":"2026-03-12T17:08:09.000Z","updatedAt":"2026-04-19T15:44:33.000Z","sourceNotes":[],"fileContents":[],"compatibility":["Unreal Engine","Engine version: 4.26+,5.0+"],"featuredImage":{"alt":"Magic Kit 01","src":"https://3dcghub.com/wp-content/uploads/2026/03/c38d577f-f411-4f15-a921-9ddd9f27c2a1.webp"},"hasDownloadLink":true,"pageviews":6},{"id":"16945","slug":"niagaraportalvfx","title":"NiagaraPortalVFX","category":"Transition","engine":"4.27,5.0+","assetVersion":"Engine version: 4.27,5.0+","engineVersion":"4.27","tag":"Transition","accent":"rose","visual":"audio","summary":"NiagaraPortalVFX provides a collection of 15 unique portal effects built using the Niagara particle system. These assets include custom size controls to fit any fantasy environment.","platform":"Unreal Engine","publishedAt":"2026-03-12T18:16:59.000Z","updatedAt":"2026-04-19T15:43:40.000Z","sourceNotes":[],"fileContents":[],"compatibility":["Unreal Engine","Engine version: 4.27,5.0+"],"featuredImage":{"alt":"NiagaraPortalVFX","src":"https://3dcghub.com/wp-content/uploads/2026/03/3b654c66-ef1d-48cc-95a3-35e7c30ef980.webp"},"hasDownloadLink":true,"pageviews":3},{"id":"16876","slug":"advanced-portals-system-vfx","title":"Advanced Portals System VFX","category":"Transition","engine":"5.0+","assetVersion":"Engine version: 5.0+","engineVersion":"5.0","tag":"Transition","accent":"cyan","visual":"city","summary":"Enhance your game environments with the Advanced Portals System VFX, a versatile Niagara-based pack for Unreal Engine 5. Create atmospheric transitions and interdimensional gates for any genre.","platform":"Unreal Engine","publishedAt":"2026-03-12T18:11:26.000Z","updatedAt":"2026-04-19T15:43:41.000Z","sourceNotes":[],"fileContents":[],"compatibility":["Unreal Engine","Engine version: 5.0+"],"featuredImage":{"alt":"Advanced Portals System VFX","src":"https://3dcghub.com/wp-content/uploads/2026/03/327cf063-9e2b-433b-992b-e8faf0c3a79e.webp"},"hasDownloadLink":true,"pageviews":7}]}
Transition
Niagara Morphing Examples
Explore high-quality Niagara Morphing Examples designed for seamless visual transitions. This guide covers the essential setup requirements for using Niagara Systems and the BP_Morpher blueprint effectively.
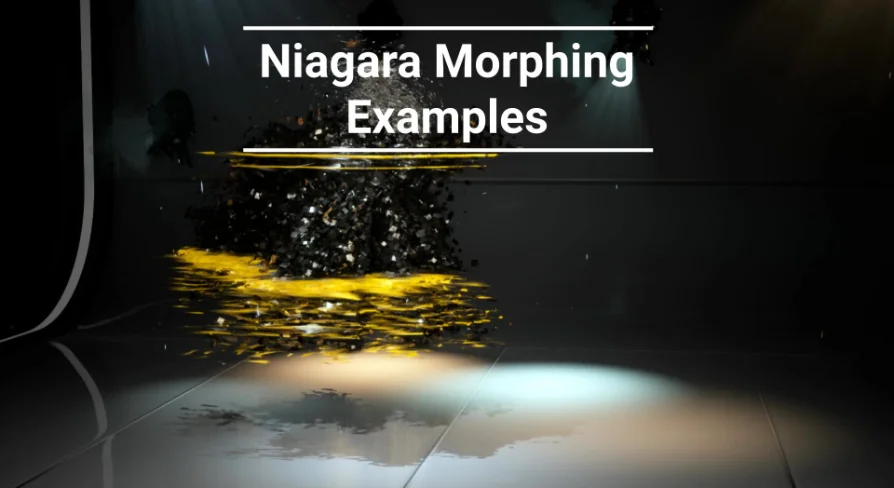
Niagara Morphing Examples offer a specialized look into creating dynamic transitions using Niagara Systems. These examples provide a framework for developers to understand how particles and meshes interact during a morphing sequence. By utilizing the power of the Niagara framework, you can achieve complex visual effects that bridge the gap between different skeletal mesh states. These Niagara Morphing Examples are designed to be integrated into various projects requiring high-quality visual transitions.
Essential Setup Requirements
To successfully implement these Niagara Morphing Examples, several technical prerequisites must be met. First, you must ensure that morphing functionality is added directly to your materials. You can reference the materials included in the examples to understand the specific logic required for the transition to work. Moreover, the creator recommends that Skeletal Meshes (SK) do not contain an excessive number of materials. Minimizing material slots can impact performance and simplify the overall setup.
Before testing the effects, it is vital that all shaders are fully compiled. Additionally, the scale of the objects involved in the morphing process should not differ significantly from one another. Keeping scales consistent ensures a smoother visual transition between the source and target meshes. Therefore, careful preparation of your assets is key to achieving the best results with these Niagara Morphing Examples.
Working with BP_Morpher
The core logic of these examples often relies on a specific blueprint known as BP_Morpher. This tool allows for precise control over the morphing behavior. However, you must ensure that all settings within BP_Morpher are changed to the required values for your specific project needs. Adjusting these parameters is necessary to align the Niagara System with your custom Skeletal Meshes. Consequently, the blueprint serves as the central hub for managing how the morphing effect executes.
Optimizing Your Visual Effects
When working with these Niagara Morphing Examples, performance and visual clarity are paramount. Following the developer's guidelines regarding material count and shader compilation will prevent common technical issues. Furthermore, the creator provides video tutorials to assist users in navigating the project setup and mastering the morphing techniques. These resources help clarify how the Niagara Systems interact with the materials and blueprints provided in the package. By studying the demonstrations, you can better understand the potential of these visual effects.
Final Take
Niagara Morphing Examples serve as an excellent resource for anyone looking to enhance their visual effects library. By adhering to the setup requirements for materials, scales, and the BP_Morpher blueprint, you can create professional-grade morphing transitions. These examples highlight the versatility of Niagara Systems in modern game development workflows and provide a solid foundation for advanced VFX work.
 Transition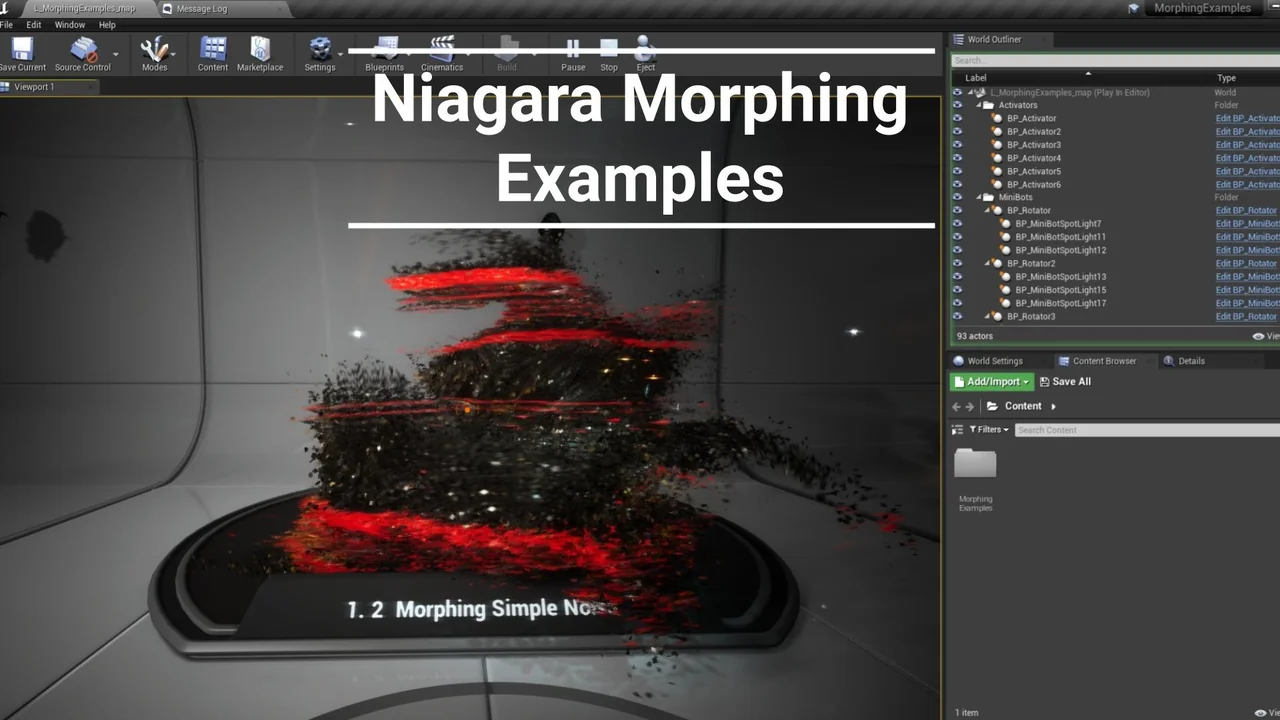
 Spells & Combat
 Transition
 Transition